New Year's vintage - beaded fantasies.
Master class on Christmas tree toys.

You will need:
Silver beads size 0.3 mm,
white pearl size 0.3 mm,
transparent 0.3 mm.
wire No. 02 silver,
small Christmas tree ball,
fishing line

First we begin to braid the ball.
We put on the fishing line, alternating through a bead, as many beads as can fit in the girth at the base of the ball.

Then we connect it into a ring, passing the fishing line 2 times and throwing it onto the base of the ball.

Pull it tight and make two knots. We do not cut the fishing line and then string the beads alternating through one, white, silver and so on.

From the base of the ball, we draw beads strung in alternating patterns along the radius of the ball and connect them closely to the base of the ball as shown in the picture. We tie it into two knots.

To make it stronger, you can go in the opposite direction of the beads and also secure with two knots.

Like this. Then, along the base, we bring the fishing line through the beads to the cross-shaped side of the ball and also collect alternating beads

At the bottom of the ball we connect the fishing line crosswise. And we continue to braid the ball.

We always go out with the line to the top of the base of the ball. Then we slightly shift the braid of the ball. And we continue to braid.

It should look like this.

Braided like this. View from above.

Side view.

This is what the braid of the ball should look like at the bottom.

Then we tie it by passing a wire through the bead at the bottom. We select one main color of beads, for example white, or one color silver. You need to collect 12 pieces. beads and going up in a spiral, pass the wire through the bead in a row, passing 1 bead each time.

Rising upward in a spiral.

Each time we climb 1 bead to the top, we collect 12 pieces. beads

It should look like this.

The first row should go to the base of the ball like this, and from the base with the second row we will go down if the wire has not run out. If there is not enough wire, then at the base we also fasten the wire through a bead by twisting it. Well, if there is enough wire to get there step by step as we went up, then we continue to go down, keeping in the middle between the row and the base.

When the second row goes down the ball. Then you immediately secure the wire through the bead by twisting it. then you again take another wire, secure it and you will already see where you can go in the third row according to the description to the top, adhering to the middle between the row and the bottom of the ball. It should look like this in the photo.

Appearance of a braided ball at the base.


New Year's balls. Master Class.

We will need:
1. Nylon threads (I use leather threads)
2. Beads or beads of two colors. In this case, take beads No. 10 and No. 7
3. Bead needle
4. New Year's ball

Thread the thread into the needle. I unwind about 2 m. We collect 1 bead and fasten the thread to it several times.

Then we dial 1 orange, 3 purple, and do this 6 times. Next we collect 1 orange, 1 purple.

We pass the needle through the first orange bead. And we begin a new series...

We collect 3 purple, 1 orange, 3 purple

And we pass with a needle, as shown in the photo (into the third orange bead)

It should turn out like this.
Now we constantly collect 7 beads, reaching the end

Then we collect 3 purple, 1 orange, 1 purple
We thread the needle through the first orange bead.

Again we collect 3 purple, 1 orange, 3 purple and pass the needle through the third orange bead.

We continue to weave like this, trying it on the ball. There should be a short distance left.
The places where we started and where we ended should be as shown in the photo.

We collect 3 purple beads and thread them through the second orange bead from the opposite edge.


And we thread the third orange bead on the other side...

Thus connecting our grid. Etc.


And we pass the needle through the orange bead

We collect 3 purple ones and thread them through the orange beads as shown in the photo.

And we fix it

Let's try it on the ball. This...

Now let's start braiding the bottom of the ball.
We need to count how many corners there are. In my case it turned out to be 23

We collect 23 beads and connect them into a ring. They tied a knot.

Let's place it in the middle of the ball and try on how many beads we need to collect.
I decided to dial 12

We thread the needle as shown in the photo.

And we return back through the beads

We drag the needle through the bead in the ring. And again we collect 12 beads, etc.
It's better not to work on a ball.

It should look like this

Final stage. We collect beads again, but here we need to take into account the circumference of the fastener on the ball. We need to try it on. You usually need more beads. Many got 29 pieces. We also connect it into a ring...

And put it on the ball.

Now comes the hard part (in my opinion). We string beads and try them on. ATTENTION: when tensioning the thread, the beads must fit snugly to the ball and not dangle. It's better to score less than more.

The connection principle is the same as with the bottom. Only now we are working on the ball. And because We have more beads in the ring, so sometimes we thread it through two. Here you just need to make an approximate calculation.

It should look like this

The ball is ready!

Instead of beads, you can use bugles and cutting. Then we collect 1 piece of glass beads...

And there are two cuttings.

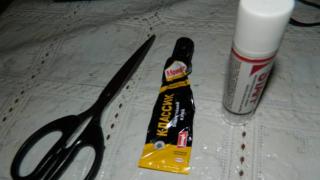
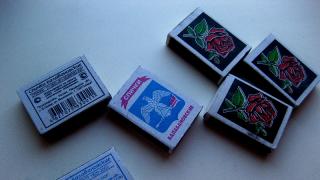
DIY New Year's toys made from sequins.

For the toy, white sequins in the shape of snowflakes, purple sequins - flowers, convex pink sequins, purple foil and needles with pearl heads were used. We will attach all this to a workpiece - a ball of construction foam with a diameter of 6 cm.

First of all, wrap the workpiece in foil and level it. Then we begin a set of sequins on the needle, while arranging our sequins in the following sequence: first a snowflake, then a pink sequin, and then a purple one. All that remains is to attach the pin to the ball as it was done in the photo above.

Carefully fill the entire surface of the ball, trying to keep the gaps to a minimum. You can, of course, place one set of paillettes on top of another, but then you should make sure that all the snowflakes are at an equal distance from each other.

So our Christmas tree toy is ready.

Arm yourself with your own imagination and start creating original toys that will definitely bring a truly fabulous mood to your home.
Good luck in your endeavors!


Balls in snowflakes. Master Class.

You will need
Beads size 03 mm, gold, silver, and pearl colors, fishing line.
First, we make snowflakes for the balls. We collect 6 beads, connect them in a circle, and secure them with two knots. Then we pass a bead through the middle, it turns out like a flower.

Then we attach one more bead to each bead, you get a snowflake.

We secure it with two knots, this is what a snowflake should look like. 3 photos. We take a ball like a snowball, white snowflakes, 03 mm pearl beads and large transparent beads, fishing line. We assemble a ring for the base of the ball by alternating beads, white, transparent. We connect with two knots.

We put a ball on the base, then we attach a transparent bead to the base and then a snowflake to it, and so we attach it crosswise along the entire base. All the fishing line should go inside the beads.

To these snowflakes we attach 2 transparent beads and again snowflakes to them. (In total it will take 29 snowflakes for the ball.) According to the circumference of the diameter of the ball there should be 9 snowflakes in a circle (photo 4).

Be sure to have 2 transparent beads between the snowflakes. Maintain proportions. Also attach the snowflakes that will go crosswise, photo No. 3. In photo No. 4 the bottom should look like this.

Then, between the cross-shaped snowflakes of photo No. 1, going down a little, we also attach 2 transparent beads. There are always 2 transparent beads between white snowflakes. I’ll show you how to attach snowflakes in detail below on a blue ball.

You should end up with a soft ball like this.

Take a ball slightly smaller than the white one. It will take 21 snowflakes, you will need 03 mm silver beads, large transparent blue beads, and fishing line. Everything is the same as on that ball, we collect alternating beads, silver, transparent blue and so on. Connect at the base of the ball.

We attach a snowflake through a transparent bead, and so we attach 4 of them. Then for each 2 transparent ones and again snowflakes.

There should be 7 snowflakes along the circumference radius. Cross to cross with 3 snowflakes on both sides. We alternate snowflakes through two transparent beads. Photo No. 4 the bottom should connect like this.

Now we attach the snowflakes into the cross-shaped spaces in the same way as in the photo.

We attach 2 snowflakes between the cross-shaped snowflakes as in photo No. 3. The ball should look like in photo No. 4.

Christmas balls - decoration with beads. Master Class.

To work you will need
1 plastic ball with a diameter of 6 cm
2 Czech beads in red, white and gold colors
3-plastic round and shaped beads, white transparent and red

Cut 1 m of thread, preferably pass the thread through the wax, dial 40 red beads.

Pass again through the first bead, completing the circle.

You can go around the circle a second time, securing it.

Second row: cast on 1 red bead, pass the needle through the 3rd third bead, skip one, cast on 1 red bead again. and go through the 5th encore. etc.

Tighten the thread so that the beads fit snugly against each other. Cast on the last bead. second row, pass the needle through the first encore. first row (in the ring) and first encore. second row. Only after this should you weave the next row. Thus, the beads separated and stood in a checkerboard pattern - this type of weaving is called “mosaic”.
Third row - cast on 1 white bead, go through the protruding bead of the previous row, cast on 2 gold beads, go through the next protruding bead. previous row.

And so on until the end of the row, not forgetting, closing each row, to pass the needle through the first beads of the previous row and the one just woven.

Fourth row - dial 1 white bis. and go through 2 gold from the previous row, collect 9 gold and go through the same 2 gold from the previous row again. row., dial 1 white and go to white.

So until the end of the row there is an alternation, a set of 2 white and 9 gold.

Fifth row - the needle came out of the white bead. and you need to go through 5 more golden encores. previous row-ring. Dial 4 red, 1 white, 4 red bis. and go to the middle-5 golden encore. next ring.

Again we scored 4 red, 1 white, 4 red and so on until the end of the row.

Sixth row - the needle came out of the white bead. Collect 6 red, 1 gold, 1 round plastic white bead, 1 gold, 1 large clear plastic bead and 3 gold beads.

Leaving 3 gold beads at the end, pass the needle in the opposite direction through plastic beads and gold beads.

Collect 6 red bis. and go to the next white encore.

Collect 8 red beads, 1 gold, 1 small transparent bead, 1 gold, 1 red bead, 1 gold, 1 large transparent bead and 3 gold beads.

Leaving 3 gold beads at the end, pass the needle in the opposite direction through all the plastic beads and gold beads

Collect 8 red bis. and go to the same white encore.

Repeat alternating small and large pendants. Here I have run out of thread, I need to go with the tip to the first row, securing the thread. And also draw a new thread from the first row so that nothing falls apart at the most inopportune moment.

Well, our napkin net is actually ready.

We put it on the ball, you can glue it with glue near the base, then our decor will not get lost anywhere. Or you can leave it as it is and then you can change it to different balls every year.

The following meshes are woven using the same pattern, only different beads are taken.


And here they are, our beauties.

The beads themselves are elegant. And toys for decorating a New Year tree, decorating a table or home from it turn out to be unusual and truly exclusive. After all, something that is made with your own hands in a single copy cannot be found among friends or in a store. Angels, Christmas trees, stars, balls, Santa Clauses - these are not all New Year's bead toys that can be made quickly.
Some jewelry is very difficult to make and requires serious beading skills. Others can be done even by those who have never held wire or beads in their hands before.
Clear diagrams, a little time and effort - and you will have a completely unique creation in your hands. You can hang it on the Christmas tree, decorate your home, or give it to friends. Such a gift will definitely not get lost among numerous boxes and bags.
Experts are sure that any work should begin with preparation. So that everything is at hand during the creation of a masterpiece, and nothing distracts from the creative process.
New Year's toys made from beads and beads do not require special preparatory measures in this regard.
You just need to put comfortable pliers nearby, preferably with narrow ends. Stock up on wire - thick and thin, colored if necessary. And also fishing line, if it is supposed to be used.
Of course, you need beads and beads. Here fantasy is not limited to anything.
Additional details - ribbons, bells and anything else. You can decorate jewelry using a variety of elements.
Simple and fast
A very simple toy that you can make yourself with your child. The process of making it is easy to build in the form of a game, this will make it more exciting.
First, we inflate the balloon to the size we need. Then we take a thin beading wire and string beads and seed beads onto it. You can choose beads of two colors or one. You can make a real colored fireworks display using beads of different shades, configurations and sizes. 
A little trick when making such a ball: you shouldn’t put all the beads on at once - it’s better to do it gradually. We strung a small section and wrapped it around the ball once. We intertwined the wire at the top, secured it, and continued.
It is important to ensure that the wire does not cover the ball too tightly: it may burst from excessive pressure.
When the work comes to an end, it is worth understanding exactly how you plan to hang the ball on the Christmas tree. A wire can act as a loop. Then you need to leave enough of it to make a loop or hook. Another option for the scheme is to hang the ball on a ribbon. It is tied to the weave of the wire at the top.

When the work is completed, the inflatable ball is burst and carefully removed from the frame. The decoration is ready!
Christmas tree and snowflake
Schemes for making toys from beads are very simple. For example, a Christmas tree. It requires green beads and several large and medium-sized bright beads.
First, the tip of the wire is bent to prevent the beads from slipping off. Then they put on a large bead - this will be the top of the Christmas tree. Then they string several green beads and another bead. And so on. 
When all the wire is filled, it is twisted into a spiral. If you then gently pull the “top”, the spiral will turn into a cone. Another option is to make a cone out of cardboard and wrap it with wire and beads to get the desired shape for the finished decoration.
You can hang the decoration on a thread or ribbon. 
A more complex decoration is a snowflake. It is made from blue or white transparent beads and beads of the same shade. It turns out very beautiful and impressive. The scheme is as follows:
- First, the middle of the snow patch is formed - 6 beads are put on a wire and connected into a ring; the wire at the junction is intertwined to secure it.
- Then a large bead is strung on one end of the wire, then several small ones, and now the second large bead.
- The resulting row is bent into a ring, and the wire is passed through the bead at its base - brought out on its other side.
- The process is repeated until the second circle of the snowflake is ready.
- You can make a snowflake of any size by adding rows.


Beads and lace
Beads look very beautiful in combination with lace. If you look at the diagrams, you can understand how to make a lace ball decorated with beads and sequins.
To do this, take a plastic bag from which a ball is made. It is wrapped with threads, achieving the most correct shape. You can further strengthen the structure with PVA glue. 
Then the ball is wrapped in a piece of lace or tulle, also secured with glue. Now you can embroider the fabric: thread a needle through the lace, put a sequin on it, then a bead and again pass the thread through the sequin, returning it to the fabric. 
Angels on holiday
New Year's toys made of beads come in different varieties. A traditional Christmas decoration, angels, are made from a variety of materials. Beads are also a suitable solution. 
For example, you can make an angel from golden, white and green beads, red and white beads:
- The first step of the scheme is the head, it is made from a large white bead; First, bend the tip of the wire, then put on the bead.
- The second step is a corset, it is made from a slightly smaller oval-shaped bead.
- The third step - hands, fasten a wire between the head and the corset, put on it in turn two white elongated beads and three round golden ones; the wire ends are hidden in the outermost white beads.
- The fourth step is the skirt, it is made in the form of a cone from beads and beads of different shapes and colors; the finished skirt is attached to the body using wire.
- The fifth step of the scheme is the wings, they are woven from golden-colored beads and attached to the back of the angel.
You can decorate the angel's head with a crown. To do this, at the beginning of the work they make a wreath of white beads, and only then put on a large white bead.
Christmas wreath
A traditional Christmas wreath doesn't have to be made of leaves, flowers and pine cones. A beaded wreath is also a very interesting decoration. Also unusual. 
The wreath will turn out very impressive if you use large green beads in the shape of crystals to make it. You will also need a lot of large red matte beads. And large golden ones. The main material for the wreath can be wire or fishing line.
The process is quite complicated, but if you stick to the scheme, everything will definitely work out. An important point is that you need to act with two needles at once.
First, 10 round-shaped pieces are woven from green beads and red beads. Then they are connected into a wreath. When it is completely ready, it is wrapped in a pre-woven chain of gold beads. Hang the decoration on a Christmas tree, door or other place on a loop made of red beads.
You can add a bell.
The stars are in our hands
Even small children can make New Year's stars using beads if they find patterns. With the help of parents, such a bright, elegant decoration can be created very quickly. 
Two types of colored wire are taken - thin and thick. You will also need beads of different sizes, white transparent, or in a different color. And beads of different shapes and shades.
First, the thick wire needs to be bent so that you get the outline of a star. If it is expected that in the future it will decorate the top of the Christmas tree, then from the ends of the wire at the bottom of the silhouette it is worth constructing a mount, on which the star will then “sit”. If the decoration is to be hung, then the ends of the wire are carefully tucked in. And after finishing the work, a ribbon is tied to the upper beam.
The second stage of making a toy is wrapping the main thick wire with thinner colored wire. At the same time, beads and beads are put on it.
You can light your star if you insert a lamp from a New Year's garland or LEDs inside it.
New Year's candle
You can complement your New Year's decor with an exquisite beaded candlestick. This is a whole composition that can be used to decorate a holiday table or give as a gift to someone. 
It's good to have everything you need at hand. It is worth preparing thick wire in advance, thinner golden wire to make curls. You need beads and beads, as well as a satin ribbon. A ceramic salt shaker can serve as a candle stand.
We make leaves: we decorate a thin wire with green beads and form a loop. Stepping back a little more, we make a second loop, then a third. And so 9 pieces.
Fold the wire with the leaves in half - you get a twig. The leaves are placed in pairs; to do this, you need to twist the wire. A total of 7 branches are needed.
And also, as the diagrams say, they make 7 shorter branches to decorate the candlestick below - to make a wreath out of them. They are decorated with pink beads.
An arch is made from thick wire, the ends are bent to form legs.
The finished arch is decorated with twigs and golden wire, which is bent in the shape of curls. A bow is attached to the top.
You can decorate the candlestick with bells - you can weave them or simply hang them ready-made from metal or plastic.
Santa Claus and company
Those who are already familiar with beadwork can be advised to weave, for example, such funny Santa Clauses. Using the same technique, make a Snowman or a symbol of the coming year - a monkey.

You can take a smooth plastic New Year's ball and braid it with beads of different colors.
It is important to remember that it is better to glue beads or beads from the edges of the workpiece to the center. They can be of different colors, shapes and sizes.
Get creative, and the pleasure of waiting for everyone’s favorite holiday will increase a hundredfold!
Fluffy Christmas tree made of beads: master class
And decorate your home or Christmas tree with them.
You can also use these crafts to decorate gifts, for loved ones, or as a separate gift from children.
Here is just a small part of the crafts that you can make with your own hands from beads and seed beads.
How to make New Year's toys from beads
You will need:
Thin wire (you can use flower wire)
Wire cutters
1. Prepare a long thin wire and start stringing beads of different colors, sizes and shapes onto it.
2. Inflate the balloon of the size you need.

3. Start wrapping the ball with wire and beads. You can leave a lot of wire at the end to make a hook, or you can use all the wire and add thread or ribbon to hang the toy on the tree.
*You can gradually add beads as you wrap the ball.

4. When wrapping with wire, try to twist it in the same place so that after removing the ball the wire does not unravel (this is why we recommend making a hook).
* Do not wrap the balloon too tightly to prevent it from bursting.

5. When you have wrapped the entire ball, make a hook out of the remaining wire and trim off the excess.

6. Deflate the ball and you will get a beautiful New Year's ball made of beads.

New Year's decorations made of beads: Christmas tree for Christmas tree

You will need:
Wire (thick and thin enough to string beads on) or a thin pipe cleaner
Beads and beads of different colors and shapes
Cone (you can make it yourself from cardboard) - optional

1. Prepare a cone and wrap it with wire in a spiral.If you don’t want to make a cone, you can twist the wire with beads into a spiral and then pull one end of the wire (the central one) to make a Christmas tree.
2. Bend the ends of the wire so that the beads do not fall out.
3. Start stringing beads and/or seed beads onto it.


4. You can add some ribbon and string to hang the ornament on the tree.
5. Pull one end of the wire to straighten the Christmas tree.


New Year's toys made of beads (master class, diagrams): mini wreath

You will need:
Thin wire
Beads 3 colors
Pliers (to make it easier to twist the wire)
Wire cutters
PVA glue (if necessary)
1. Prepare a thin wire and wrap it around three fingers several times. Twist the ends.


2. Cut three pieces of wire of the same length - in this example, each length is 45 cm. Twist the ends of the wires on one side.

3. From the reverse side, start stringing beads - one color on each wire. The beads should cover each wire by 30 cm.


4. Start braiding three wires covered with beads.


6. Use wire cutters to remove excess wire.
7. Tie a ribbon to where the ends of the wire are attached and tie it so that you can hang a mini wreath.

8. If you wish, you can make a bow from a separate ribbon and glue or sew it to the already attached ribbon.
9. Using PVA glue you can better secure the braid to the wreath, but this is not necessary.

New Year's patterns made of beads: snowflake made of beads (photo)


New Year's beadwork: Christmas tree

You will need:
Beads and beads
Wire
Pliers
Wire cutters
* To make a white tree, use silver wire, and for a green tree, use copper wire.
* This small Christmas tree is woven using the “loop and twist” technique. Everything is quite simple, but this technique requires a lot of free time.

Each loop contains 6 green beads and 2 golden ones. To make it, collect beads in the following sequence: 3 green, 2 gold and 3 green. After this, twist the wire and repeat until you have collected the required number of pieces.

* From the top to the base the branch becomes larger, as does the number of loops.
* When you have created the required number of branches, start attaching them to the stem in a circle.


How to make a Christmas tree from beads (video)
DIY New Year's beadwork: balls made of beads and lace

You will need:
Plastic bag
Sequins
Tulle or lace (organza or opaque fabric may be alternatives)

1. Take a plastic bag and crumple it into a ball shape.
2. Wrap thread around the crumpled bag. You will get a more or less even ball.
New Year's balls made of beads: DIY decor options (diagram)New Year's balls made of beads: DIY decor options (diagram)
Any needlewoman will probably want to decorate her New Year tree with homemade toys. And it’s no secret that the brightest and most sparkling toys will probably be those woven from beads. After all, no other material can have such a variety of shades and shine. A beaded ball will not only be a wonderful and unusual decoration for your Christmas tree, but can also serve as a delightful and unique gift for your family and friends on New Year's Eve. Such New Year's balls are usually created using weaving techniques, using various patterns. 


You will get the most magical and charming Christmas ball if you can weave a ball made of glass. After all, it is this kind of ball that has a mysterious shine and is painted, usually in colors that are more delicate than plastic toys. However, this is not so easy to do. After all, such Christmas tree decorations are quite fragile and you can easily make a bunch of New Year’s fragments out of them. It is much easier to reproduce the master class explaining the braiding of a plastic ball. Such a New Year's souvenir will be both more practical and durable. To repeat our master class on braiding a ball and make a wonderful decoration for the New Year tree, select brightly colored beads. It is better if it shines and shimmers. You will also need beads, stones and ribbons. In general, everything that can be used to make our ball even more attractive.
Master class on simple braiding of a New Year's ball

New Year's ball braided with strings of beads The easiest way to weave Christmas balls is to use several strings assembled from beads and beads for this purpose. To make such a toy, purchase a ball with a circumference of 21 centimeters, beads having a size of 7/0 and beads of various shapes, but not exceeding the size of 5 mm. Don’t forget about the fishing line on which all your materials will be attached to create a New Year’s miracle. To make your ball the most beautiful, use beads and beads for weaving in colors that will go well with the shades of your ball. There should be a lot of beads on the ball, so you should not use their glass version. After all, then your New Year's gift will be too heavy.
First, you need to put beads and seed beads on the fishing line and, by connecting the ends of the fishing line, make two rings with a diameter of 3 cm, with the number of beads being a multiple of twelve. After all, later you should end up with twelve strings connecting both “poles” of the Christmas ball. These rings will wrap around our New Year's ball from above and below. Place these rings and lightly mark their location with a marker or scratch the surface of the ball with a needle. Take a centimeter and measure the distance between the points. This must be done in order to determine the length of the weave.
You can place the beads as low as you like. Experiment to find the best one later. Weaving low is carried out according to the following scheme. 
Fasten the thread to a bead on one of the rings. Place beads and beads on the thread in the order you like. After this, pass the needle through the corresponding bead of the second ring and back through the entire bottom. Here you should pull the thread tight and thread it back into the bead you started with. And then move on to the second bead of the ring, repeating the whole process. So you have to do twelve low. After the ninth is woven, you can insert your New Year's ball and continue working. At the end of weaving, fasten the thread and disguise the knot. Tie an interesting loop to your ball using ribbon and small Christmas decorations. All this must necessarily match the color.
Braiding a Christmas ball with parallel weaving
Buy a plastic Christmas ball, 7cm in diameter, and size 10/0 beads in two bright and contrasting colors. Let in our example it be blue and white. You will also need beads of the same blue color, but size 5/0 and bead wire. 
Pattern diagram with parallel weaving for braiding a New Year's ball. Let's begin our master class. To begin, take size 10/0 seed beads and weave a nine-piece star onto the wire. A diamond weaving pattern is used to create each piece.
Cut 60 cm of wire, put a blue bead on it, and then two more and pass the other wire edge through them in the opposite direction. Now you need to give your weave a good tightening. These are two rows ready. For the next one, pick up blue, white and blue beads again and again pull the other end of your wire piece through them. Continue weaving according to the diamond weaving pattern. At the very end, twist and cut the wire “tails”, leaving 1 cm, which needs to be folded to the inside.
The next diamond should be made in the same way, but when you reach the weaving of the widest part, pass the wire through the wire loop of the diamond made earlier. And then connect all the rows in sequence. So you should collect all nine diamonds together. The last diamond will merge with its neighbors on both sides. All your ponytails should be curled in one direction. Now you have received a star and you need to make another one of the same kind. This will be the longest part of your New Year's work.
After both stars are ready, you will need to connect them. For connecting weaving it is better to use fishing line. Using loops, we connect the stars to each other, working with both ends of the fishing line.
New Year's ball braided using parallel weaving on wire. Place the stars together so that the sides with the tails are turned inward. Place one blue 5/0 bead on the line, then four white 10/0 beads, one blue bead and then four white beads on each end of the line. Pass the edges of the fishing line through the beads of any diamond pair and repeat the same set. Finally, pass both ends of the fishing line through one bead and pull it off. You get a loop that connects your stars to each other. Instead of beads of size 5/0, you can use beads of the appropriate diameter or pebbles, or even create crosses at the location of these beads with small beads.
When you finish weaving the closing loop, stretch it and insert the New Year's ball. Then tighten the weave again. The ear of the Christmas ball should fall into one of the loops. When all the work is completed, secure the fishing line and hide its edge so that it is not visible.
You can also braid the entire ball with a continuous beaded fabric, depicting some New Year's pattern or design on it. A correctly selected bead weaving pattern will help you with this.
Now decorate your Christmas tree with a beautiful tandem of beaded balls. It would also be nice to make a beaded Christmas tree and place it next to this beauty.
Video: Making decorations for Christmas balls
Comments
Related posts:
 Beaded snowflakes: DIY New Year's decorations (diagram)
 Beaded jasmine: do-it-yourself weaving pattern (video)