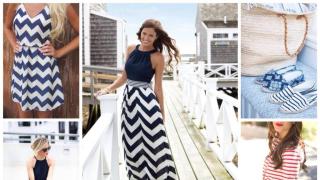
Morning devices will allow super-moms to quickly gather their beloved child without tears or hysterics. The unawakened owl should turn into a princess and go to kindergarten in a great mood. Choosing a hairstyle becomes a real challenge. It must withstand everything - outdoor adventures, struggle for toys, active exercises, while remaining comfortable, reliable and stylish; it takes no more than 5 minutes to create.
For this article, we have selected 10 of the easiest and most beautiful hairstyles for girls in kindergarten that mom can do in 5 minutes. The implementation of each is described step by step, it will be easy to master new options with a little practice.
Bow
The hairstyle seems complicated, but all mothers can master it. The classic ponytail is the basis of the all-time hit. Performed on medium and long curls, it looks impressive on strands with an even stem structure.
Photo: cute hairstyle for a girl in kindergarten - “Bow”
Step by step execution :
- Tie a high ponytail, at the crown, at the back of the head, in the center or offset to the side - it all depends on the desired result.
- It is recommended to wet the comb with water first, then it will be easier to avoid the appearance of strands that have strayed from the total mass.
- Having fixed the tail, comb the entire volume of the free end thoroughly and divide it into 2 parts.
- Form a loop from each and attach to the center, forming a bow.
- Secure the remaining 2 free ends with bobby pins at the base of the tail, and hide the elastic band under them.
Attention! If your baby needs to wear a bow hairstyle all day, it is better to tie the ponytail at the back of her head. Then stylish styling will not damage the structure of thin children's hair.
Little dragon
If every morning you have a problem tidying up a mop of unruly strands that keep getting knocked out, disrupting the composition, you should turn to creative ponytails. Dads and even older brothers can handle the original styling; there is no need to create perfect hair-to-hair smoothness.

Photo: easy hairstyle for the garden - “Dragon”
Performing the “Dragon” hairstyle step by step:
- You'll have to stock up on silicone rubber bands, or any others. The main requirement is good fixation, but without traumatizing the hair structure.
- The first tail is tied at the base of the forehead. There is no need to pull your hair, on the contrary, slightly lift the strands of the root area to create volume.
- The second tail follows parallel to the first, tying with an elastic band, it is necessary to grab the free tip of the previous one.
- In this way, reach the back of the head, leave the free edge, alternate fixation with elastic bands will not allow the hairstyle to fall apart even with the most active activities.
- To add volume, you can slightly stretch the strands of the main part, creating textured arcs.
Attention! By arranging the strands asymmetrically, it is easy to get a new style. As an option, you can make 2 parallel rows of such alternating volumetric ponytails.
Mickey Mouse
A hairstyle for a girl with short hair that her mother can afford by creating a family look. It’s hard to imagine how old this styling is, but its simplicity and speed of execution make it a leader in kindergarten beauty trends.

Photo: quick Mickey Mouse hairstyle for girls
Stages of creating a hairstyle:
- Part your hair. You can make a classic straight or zigzag. For festive occasions, you should choose overlapping strands; the styling will look new, as if it had just come from a salon.
- Divide the entire volume into 2 parts, these will be the future Mickey Mouse ears.
- Tie standard ponytails; the length of the hair should allow the ends to be at least 3-5 cm.
- Secure the cut of the strands with an elastic band, making a kind of loop. Straighten thoroughly to obtain the desired volume.
- The free edge, if the length allows, can be braided and wrapped around a loop, secured with bobby pins and elegant elastic bands with your favorite cartoon characters.
Attention! The same hairstyle can be done not on the entire volume of hair, but only on the parietal part. Suitable for little princesses with thin short hair that is still difficult to put into ponytails.
Cobweb
An excellent option for both holidays and everyday kindergarten routine. Suitable for girls with thin, not thick hair, above shoulder length. It’s easy to give unruly strands the desired direction, and the styling will withstand an active day of pastime.

Photo: “Spiderweb” hairstyle - an everyday and festive version of weaving in the garden
- After combing your hair, tie it into a ponytail on the top of your head, part it like a palm tree in the center, these strands will be part of the braid.
- Select forehead hair, form 2 parts, start braiding. The third part will be the strands from the ponytail. For clarity, you can watch the video.
- In this way, the braid is woven in a circle, each time capturing a part from the previously tied ponytail.
- Secure the tip remaining after a full circle with a clip or invisible.
- It can be done at different lengths, with or without bangs, but the most comfortable is short hair just below the shoulders. Decorated with a hair clip with a floral applique, the styling turns into a hairstyle for a matinee.
Attention! Do not tighten the braid too much, this can lead to injury to thin, children's hair. A loose circular braid looks voluminous and festive, as if it were the work of a master stylist, and not a caring mother.
Look at the weaving web:
By parting
Children's haircuts are very convenient and practical, there is room for your imagination to run wild. Original ideas will help you create a hairstyle in just a few minutes; creativity will be appreciated not only by the child, but also by her kindergarten friends.

Garden hairstyle for short hair with a parting
- Comb your hair and part it. You can use straight, zigzag, you just have to comb it differently, and the whole composition will change beyond recognition.
- Divide the top strands into 4-6 equal parts. You can do more or less, it all depends on the thickness of your hair.
- Tie identical ponytails not only in thickness. They should also be fixed parallel to each other.
- Divide the base of each ponytail in half.
- Insert the free edge into the resulting loop and pull it down.
- Carry out such manipulations with all the tails.
Ponytails
Despite the apparent complexity, the hairstyle is very quick and easy to do. Suitable for short and medium hair, especially if the curls are unruly and constantly trying to break out of the general pile.

Photo: kindergarten hairstyle with braided ponytails
Step by step creating a hairstyle for a girl looks like this:
- Divide the hair on the parietal area parallel to the forehead line. Divide this segment into 4-5 identical squares. The size depends on the number of tails desired; the smaller the squares, the more tails you will get.
- It is convenient to fix the separated bundles with clips, then the hairs of neighboring sections will definitely not disturb the symmetry of the composition.
- Having finished the first row, move on to the second. This time, separate the squares along the parting in a checkerboard pattern.
- Form each ponytail by grabbing the free edge of 2 ponytails from the previous row. In this way, reach the back of the head.
- If there are only 5 minutes left before leaving, it is recommended to limit yourself to 2 rows in the parietal region. Mom can be sure that curls will not interfere with her baby’s active exploration and exploration of the world.
- For a super festive hairstyle, attach a hairpin with a bow to each ponytail.
Bagels
An excellent choice for kindergarten fashionistas who are tired of weaving and spikelets. And for this you don’t have to send your mom to a stylist course; all you need is a couple of elastic bands, hairpins and 5 minutes of perseverance. A universal hairstyle that can be done not only for long, but also for medium hair.

Photo: bagels - a universal hairstyle for girls in kindergarten
- Comb the mop thoroughly and divide it along a straight parting.
- Tie high symmetrical ponytails at the top of the head. You can make them somewhat relaxed without tightening them, depriving the curls of the dynamics of volume.
- Twist the free end of each tail around its axis.
- Wrap the resulting tourniquet in a ring around an elastic band and secure with bobby pins.
- Repeat the same manipulations for the second tail.
- If the child is active, it is better to use braids instead of plaits, then the hairstyle will last until the evening.
Headband
Mothers of long-haired girls have to cope every morning with curls that tend to get tangled into knots. But even for them there is a simple solution to quickly create an original styling for a kindergarten or school.

Photo: headband is an excellent braiding option for girls with long hair
- Divide the curls into a straight or asymmetrical parting.
- Tie the ponytail at the back of your head and comb the free edge.
- Braid a standard 3-part braid.
- Wrap the resulting braid around your head like a headband. Secure around the perimeter with clamps.
- Hide the free end in the elastic band with which the braid began.
Attention! A 4, 5 or 6 piece braid will absolutely change the look of your hairstyle. For a festive look, satin ribbons are used, which add volume to thin curls, decorating a child's hairstyle.
Hearts
The “heart” hairstyle is performed both on the entire volume and only on the parietal region, it all depends on the length of the strands.

Photo: “Hearts” - an interesting option for a girl’s party
- Divide the hair in a straight or zigzag parting.
- Tie 2 ponytails on the top of your head. It is recommended to use transparent silicone elastic bands to give airiness to the styling.
- Pull the free end into the center of the elastic, turning it up.
- Divide each tail into 2 parts, form tight strands.
- Place a heart in the back of the head, tie the edge of the heart with an elastic band, and decorate with a ribbon or bow.
Attention! To prevent hairs from getting out of the main mass, comb with a comb, first moistening it in water with a few drops of essential oil. This will give your hair smoothness and shine.
Malvinka
There is nothing easier to quickly style for a little princess with short hair. What makes this hairstyle is the accessories, so you will have to stock up on elastic bands with flowers, candies, and your favorite cartoon characters. Choose a different bow for each dress, then the child can confidently claim the title of kindergarten fashionista.

Photo: cute hairstyle for girls “Mavinka”
- Comb your curls, choose a rectangle or triangle at the beginning of hair growth. The width of the base at the forehead should reach the temples. Then, with complete confidence, you can not be afraid that the strands will get into your eyes.
- Tie the selected bun of hair with an elastic band, merging to one side.
- Decorate with a bow or ribbon.
All family members can create easy, beautiful hairstyles for girls in kindergarten in 5 minutes. Creative ideas will allow you to decorate princesses with new styles. You no longer have to waste time on lengthy braiding; you can quickly and without tears deal with unruly hair, which will retain its flawless appearance by the end of the day.
Ideal hairstyles for girls in kindergarten should be created in 5 minutes, be light and beautiful. These are the options we have collected for you in this article. Little princesses should be instilled with a love of beauty and grooming from childhood. A beautiful hairstyle will give a modest girl confidence - this is an important moment for those who struggle with shyness. Repeat our ideas, and let your daughter be the most beautiful in the group!

Beautiful hairstyles for kindergarten
To ensure that the young lady's hairstyle suits her and does not cause inconvenience, follow the advice of stylists.
- For fluffy and fine hair, tight braids are not the best idea. The French version of weaving will look much better.
- Thin hair requires additional volume. To visually create it, start braiding your hairstyle from the front from the face to the back of the head.

Easy hairstyles for every day
- Curly hair is a true gift from nature. But to tame them a little, braid your ponytails on the sides or on the top of your head.
- Among all the styling products, only stylers are suitable for children. You can use it to treat unruly hair that urgently needs to be put back into a hairstyle.
- Consult your girl when choosing a hairstyle for kindergarten. This way you will save your nerve cells and not ruin her mood.

Stylish hairstyle for kindergarten
- Do not use massive hairpins and hairpins - the girl should be comfortable playing and sleeping with her hair.
- Remember also that children are little fidgets who find it difficult to sit still. Therefore, do not build complex structures on a small head - they will not last even an hour.

Beautiful hairstyles for kindergarten
Interesting:
Ideas for short hair
Short hair is not a reason to give up your hairstyle. Loose hair often gets in the face and disturbs the baby. Therefore, it is worth spending a couple of minutes in the morning to create a beautiful hairstyle. Here are some simple options.
- The best option is 2 ponytails on the sides. With short hair, this hairstyle looks adorable and cute. Children 2-3 years old are usually delighted with such a perky image.

2 ponytails - simple, beautiful, convenient
- A hairstyle made from intertwined ponytails looks unique and fun. First you need to make a straight parting, dividing your hair into 2 parts. Then divide the halves into upper and lower parts. You should have 4 strands. They need to be gathered into ponytails using elastic bands. Then form the tails into flagella and connect them at the top of the head. Secure the bun with one large elastic band.

Beautiful braided ponytails
- Another option will take you no more than a couple of minutes. Gather all your hair near your forehead and part it underneath. Divide your hair into 3 parts on 2 sides of your head. Divide the top ponytails in half. Then one half is connected to the top of the right half of the strands and a ponytail is formed. The same manipulations should be repeated on the left side of the head. The strands of the second tails should also be connected to the lower strands. You will get the effect that the ponytails flow into each other. As a result, there will be 2 lower ponytails left. They can be secured with beautiful elastic bands.

Tails intertwined
- Similar to the previous one, but simpler. Here it is also worth dividing the hair into 4 transverse parts. But in this case, the head is not divided into 2 parts by a straight parting. So, gather the top of your hair into a ponytail as close to your forehead as possible. Connect the resulting ponytail to the next part of your hair. So one tail will turn into another.

Ponytail
- Short hair can be styled into a simple, fun hairstyle that's perfect for a holiday party. To create it, divide your combed hair into several parts. Then twist each strand into a flagellum and secure the resulting shells with a hairpin and a bobby pin. A more interesting option will turn out if you release the tips of the flagella and comb them a little.
- If your hair is so short that it is not possible to put it into a hairstyle, accessories will come to the rescue. Fashionable hoops, headbands, crabs and hair clips will definitely please your little beauty.

Beautiful headbands for children's hair
Ideas for medium hair
- To remove annoying strands from your face, you can create a braided headband. To do this, separate a strand from the side of your face and braid a French braid, connecting strands on both sides. Tie the end of the braid with an elastic band and hide it under your hair.

Beautiful braided headband
- Light and beautiful hair hearts look flirty. Divide your hair into 2 parts with a straight parting and form 2 ponytails. Pull each of them into the notch in the middle above the elastic band. Then divide the tails into 2 parts and twist flagella from them. Next, you need to twist the hearts from the strands in place of each of the tails and secure the result.

Hearts on hair
- Among all the hairstyles for girls in kindergarten in 5 minutes, the original version with knots is popular. To repeat it, select 6 strands from the top of your head and tie them with thin elastic bands. Next, tie knots in the middle of the strand. All that remains is to connect all the hair into a side ponytail or bun.
- Small elastic bands will also be used in this hairstyle. Divide your hair into 2 parts using a vertical parting. Braid a ponytail or bun on one side. In the second half, braid 3 thin ponytails, weaving each of them into the previous one and collect all the hair in a bun or ponytail.
- Medium-length hair can be easily styled into a flirty bow in 5 minutes. To realize your idea, take a high ponytail, but do not pull your hair all the way through. This will create a kind of drop. Divide it to make a bow, and the tip of the tail will be a separator into 2 parts. Don't forget to pin the middle of the bow with a bobby pin or bobby pin.

Flirty and stylish - hair bow
Ideas for long hair
- To demonstrate the beauty of your hair, you can leave it loose. The side strands need to be braided into thin braids and connected at the back with an elastic band as in the photo. This hairstyle for girls in kindergarten will turn out to be an option for a holiday if you curl your loose hair.

Loose hair with a braid
- A long-haired beauty can be offered to braid a side braid or 2 buns. These are common daily options.
- An elegant side bun will help turn any girl into a little lady: any mother can follow its step-by-step steps. You need to collect your hair in a side ponytail, then braid 3 braids from it. Wrap each of them around the base of the ponytail and secure with hairpins.

Beautiful bun for kindergarten
- A great option for prom is a Greek hairstyle. It is done in literally a couple of minutes. Place a special elastic band all over the girl's head. Braid a low ponytail and twist all the strands between the elastic band and your head. To prevent the strands from sticking out, tuck them under an elastic band.

Greek hairstyle
Our hairstyles for girls in kindergarten for every day with photos will allow you to put together a little princess quickly and in a good mood. A couple of minutes of witchcraft over the little head, and the daughter is ready to be the most beautiful in the group.
Child 48
Hello, dear blog guests! I have accumulated a collection of photos for you with hairstyles for girls in kindergarten. Getting ready usually shouldn’t take much time, so my daughter’s styling is quite simple, everyday, easy and quick to do if you practice in advance.
I try to create hairstyles that will hold up well throughout the day. I don’t use nail polish or stilettos for everyday use. Children are very active, hairpins can injure the head in the event of an unfortunate fall, and the use of hairspray is unacceptable for children's hair, especially every day.
To ensure that the girl is diligent while her mother is creating beauty, you can turn on a cartoon or an audio fairy tale for the baby. My daughter and I usually have conversations while combing our hair; she is very sociable, so she is not particularly indignant about manipulating her hair.
Read interesting:
Hairstyles for girls: photo instructions
1. Throw your hair to one side at the front of your head, and gather the back into a ponytail.

Braid the first braid with a spikelet in the front of the head, then separate part of the hair from the tail, make a spikelet in the middle part of the head, then the same at the bottom. Braid all three braids to the very ends, then gather them into a ponytail with one elastic band, unbraid the braids and braid one thick one. You can add a bow or flower to your hairstyle.

This is how you can decorate your hairstyle

2. This hairstyle is very similar to the previous one, but will take a little longer. And yet, the first two spikelets in this hairstyle should be woven not from the temple, as in the first case, but a little closer to the middle of the head. The last spikelet needs to be woven from the temple. Also, in the first case, I took strands into a spikelet both on the left and on the right, but here only on the right, i.e. from the forehead, only the last spikelet on both the left and the right.

This is what it looks like on one side

And here is the other side of creation. Braid your hair to the very ends. Then twist each braid in a circle and secure with crab clips.

3. Here I braided two spikelets. Parting strictly in the middle. Braids, as in previous versions, must be braided to the ends.

Then, I secured both braids with an elastic band at the roots, but I did not thread them all the way through the elastic, but left them in the form of a neat bun; what stuck out, I secured with hairpins. And in conclusion, she decorated everything with a large purple flower.

Here is the same option, but with a different elastic band

4. Ballerina hairstyle. For this styling option, I needed a donut, several thick elastic bands, crab hairpins and a large elastic band under which both elastic bands and hairpins are hidden in the hairstyle.

Start with spikelets from the forehead, first from one side, then from the other, parting should be on the side. Take the strands into a spikelet only from the face, i.e. On the one side. When two braids are ready, gather them together with the rest of your hair into a ponytail with an elastic band, leaving only the lower part of the hair for the third spikelet, later add it to the ponytail with another elastic band without removing the previous one. Then you can undo the braids, comb the tail and thread the hair through the bagel, I put an elastic band on the bagel and it turned out to be a bun, I twisted the remaining hair around the bun and secured it with crabs, and put a white elastic band on top

5. For this simple hairstyle, I braided the hair in advance so that the tail would be fluffy. So, parting on the side, spikelets on the left and right, strands in a spikelet taken only from one side.

The hair is then pulled back into a side ponytail, leaving the bottom of the hair for a spikelet that goes up towards the ponytail. When all three spikelets are ready, remove the elastic band and reassemble everything into a common tail. To prevent your braids from unraveling while your hair is being done, leave them with elastic bands at the ends, and when you're done, remove the elastic bands, comb your ponytail and you're done!

6. We weave ordinary spikelets, first small on the sides, then grab them into a large spikelet when weaving it

This is how you get a neat hairstyle for kindergarten, it lasts very well throughout the day

7. Toss the hair at the forehead to one side 
From the temple we weave an ordinary spikelet in a circle

This is what it looks like from the front

And like this with a flower

8. From your forehead, start collecting strands of hair into small elastic bands.

At the end, you can make a hair bow using crabs.

Watch the video to see how to make a wreath from rubber bands.
Every time, getting their daughter ready for kindergarten, thousands of mothers think about what hairstyle to give their child today? In this article we will look at easy hairstyles that will be useful for every mother and will greatly facilitate getting ready in the morning. You will learn what criteria should be followed when choosing a particular hairstyle, what tools you will need and the technique itself.
What should a hairstyle be like for kindergarten?
When you decide what hairstyle to choose for your daughter today, there are some rules to remember:
- A hairstyle for kindergarten should, first of all, be simple and practical. The child should be comfortable, nothing should put pressure on the head or cause discomfort.
- A minimum of time should be spent on its implementation, since often getting ready for kindergarten happens quickly due to the parents’ rush to work.
- Try to choose exactly what suits your daughter's hair type. You should not try to make complex hairstyles out of curly strands, and wrap weak and brittle curls in tight braids or buns. These actions can damage your baby's hair.
- Use styling products to a minimum, and if possible, avoid them altogether. A little girl doesn’t need a lot of hairspray and mousse on her hair. They can damage the still weak structure of the daughter’s hair.
What is needed to create a hairstyle?
Let's look at the tools and accessories that will help a mother create beauty on her child's head:
- Various types of combs (fine-toothed and fine-toothed combs, round brushes).
- Various hairpins (invisible hairpins, crab hairpins, daisy hairpins).
- Rubber bands of various colors and sizes.
- Bows or bow clips.
- Hair dryer or straightening iron (for creating a hairstyle in honor of the celebration).
A selection of instructions for creating simple and beautiful hairstyles for short hair
For short hair, various ponytails, combinations of braids, and the use of headbands and hair clips are suitable.
Simple tail

To perform this hairstyle, mom will need a regular comb and a beautiful elastic band. Just comb your daughter's hair at the back of her head and tie it with an elastic band.
For variety, you can change the height of the ponytail, make it high or collect your hair in a pair of ponytails on the sides. If you make ponytails on the sides, then elastic bands with pendants will look very beautiful. They will add some playfulness and beauty to such a simple hairstyle.
"Spikelet" or "little dragon"

These hairstyles are loved by all mothers for their ease of execution and beauty. Hair that is collected in this way looks very neat and cute.
How to braid "»:
- Separate three strands in the center of your head and start weaving a regular braid.
- As you weave, separate the side strands from the main body of hair and weave them into the braid one by one (left-right, left-right).
You can decorate the collected strands by tying a bright bow or a voluminous elastic band at the end of the braid.
If your daughter has short hair, then you can simply pin it up on the sides so that the strands do not fall on her face.
It would also be acceptable to use a beautiful headband. It will protect the girl’s face from excess strands and allow her to walk comfortably without braids.
A selection of instructions for creating simple and beautiful hairstyles for medium hair
If your daughter has medium curls, then all kinds of braided hairstyles will suit her perfectly.
"Fish tail"

You will need a comb and an elastic band.
Comb your curls well. If they are unruly, you can lightly moisten them with water or spray them with varnish.
Divide the strands into two even parts. Then separate a strand from the right side and place it in the center. Next, take a strand from the right side and intertwine it with the first strand. Continue braiding until you run out of curls.
Try to use thin strands. This will give the braid beauty and volume. Alternatively, you can pull the curls out of the braid a little. This creates a slight sloppiness and adds additional volume.
"Spikelet" in the form of a zigzag

This type of spikelet is perfect for those with medium-length hair. This type of weaving is distinguished by mischief, beauty and originality. Of course, the mother may not be able to cope with such weaving the first time, but subsequent attempts and practice will bring success.
In order to make such a spikelet, grab the strands from one side and start weaving the spikelet in the opposite direction. When you reach the end, turn around and weave in the opposite direction. The end of the spikelet can be braided with a beautiful elastic band or bow, or it can be picked up and hidden under the braiding using hairpins and bobby pins.
Braided ponytail

For everyday trips to kindergarten, several braids in a ponytail are perfect.
Mom will need a certain number of small elastic bands for the braids and one beautiful elastic band to collect them in a ponytail.
This ponytail is very easy to make. It is enough to braid several braids around the perimeter of your head (5 or 7 braids look best) and tie them into a high ponytail. This look looks very funny, especially if you use elastic bands of various bright colors.
A selection of instructions for creating simple and beautiful hairstyles for long hair
How beautiful children's hairstyles look on those with long, chic curls. All the girls are jealous, the mothers you know won’t praise your child, and only you know how painful getting ready in the morning can sometimes be. We have prepared several looks for you that will be perfect for your daughter's long locks.
Tail with cords

This ponytail is perfect for everyday wear, and the strands give it a certain playfulness and charm.
To achieve this hairstyle, prepare a comb, a beautiful elastic band and a couple of hairpins (they will be needed to secure the strands).
First, divide your hair into two parts. Starting from the forehead, separate a thick strand from one side and begin to twist it inward towards the head, grabbing the side strands as you go. Having reached the beginning of the neck, stop and secure the resulting tourniquet with a hairpin. Repeat with the hair on the opposite side of your head.
At the junction of the strands, tie them into a ponytail and comb the loose strands. The finished tail can be loosened a little if you slightly pull out the strands of their strands. This will add lightness and volume.
Two braids

The most popular choice for mothers is to braid two braids for daughters who have long curls. Indeed, simple braids never go out of style.
And to make the braids look more elegant and festive, you can weave bright ribbons into them, tie small bows or bright and original elastic bands at the ends.
"Palmochka"

This hairstyle is known to all of us from childhood, as it has always been very popular.
Just gather the strands on the top of your head into a high ponytail, tie it with a large elastic band and feel free to send your baby to kindergarten.
Festive hairstyles for a matinee
To create formal looks, you can use curling irons and flat irons, all kinds of varnishes with glitter and various accessories such as combs and tiaras.
The main thing is to remember that your daughter should be comfortable.
Styling with large curls

You will need a curling iron with a special attachment, a wide-tooth comb, varnish and a beautiful headband.
Decorate your head with an elegant headband. You can use a tiara or crown, depending on the image chosen for the matinee.
Laying with curls on one side

Another simple but beautiful hairstyle that is perfect for a holiday in kindergarten.
To perform, take a curling iron, a wide-toothed comb, glitter polish, bobby pins, simple hairpins and hairpins decorated with flowers.
Wind the strands onto a curling iron, first spraying each with a small amount of hairspray. Then take them apart with your hands or a comb.
Grab the strands on one side of the head just above the ear and begin to twist them in the opposite direction, going down a little, securing the curls with regular hairpins as you go. Having reached the opposite side, secure the edge of the strand with bobby pins so that they are under the hairstyle. Place pins with artificial flowers along the entire length of the strand and fix the strands with glitter varnish.

- Before doing this or that hairstyle in kindergarten, practice doing it. What if you won’t be able to achieve the desired result the first time, and your precious time will be wasted.
- Take care of the hygiene and cleanliness of your daughter’s hair, as all kinds of weaving look better on freshly washed curls.
- Avoid tight braids that will make your daughter uncomfortable. They tighten the skin too much and interfere with blood circulation, leading to headaches.
- Buy a lot of different ones to combine them, each time creating new and bright images for your daughter.
The main thing is to choose exactly what is suitable for your child in terms of length and comfort, as well as what she will like.
Oh, these little beauties! They still don’t really know how to speak, but they already spin around in front of the mirror with pleasure. And mothers are happy to help their little ones turn into real beauties, making magnificent simple
Fountain ponytails
Little ones really like buns that stick out in all directions. They are made using rubber bands. Usually one or two ponytails are enough for young beauties. But if you wish, you can decorate the head of a small yoke with three, four, five or even seven fountain bunches.
Doing these simple hairstyles for girls for every day in kindergarten is very convenient, since they take a minimum of time to complete, and all the hair is removed from the face. And using multi-colored rubber bands with various decorations, mommy gives her baby a lot of fun!
Loop tails
For variety, we can recommend types of ponytails such as loops for cutie babies. They shorten the hair somewhat, as they grab tufts not only at the roots, but also in the middle of the length. These are suitable for every day. And if you decorate the buns with beautiful hairpins and rubber bands from kanzashi, the girl will immediately turn into a little princess.

The ends of the ponytails can be slightly curled with a curling iron, or left straight. And another versatility of this hairstyle is that you can make two looped buns, or you can make any number all over the head.
Hairstyle with buns
In the 60s and 70s, women often wore their hair in buns, which were then twisted at the base and pinned up. It turned out to be sort of “buns” on the back of the head. Very little time was spent on their implementation. These were very simple hairstyles.

For girls, today we can recommend “buns-horns” for every day. This cute, playful hairstyle is made using fountain ponytails formed above the ears. The hair tufts are slightly twisted and curled around the base. After the “buns” are pinned, you can decorate them with bows, ribbons, kanzashi made of artificial flowers and hairpins with rhinestones or beads.
Hairstyle "Naughty Pippi"
“Combination of incompatible things” - these are the trends of modern fashion. And, considering the question of what simple hairstyles for girls are suitable for every day, it is worth recommending a combination of several options. For example, a girl with a bun on the left and a regular ponytail or braid on the right looks very cute.

Or you can make a braid together with a bun or a “loop”. You can also experiment with the color of the bows and the height of the details - ponytails, braids, buns.
Tangle of ponytails
Based on the well-known ponytails, we get wonderful and simple hairstyles for little girls for every day with medium hair. To complete them you will need several elastic bands and, of course, a comb that is convenient for making partings.

The head is divided into sections, laying equal rows. Secure hair that is unnecessary at this moment with hairdresser tucks so that it does not interfere. The hair of the upper section is collected in a bun and secured with an elastic band. Then the ponytail is laid along the head to the place where the second bun will be located.
Now the hair of the first bundle is collected together with the strands of the second section. They are also secured with an elastic band.
Hairstyle “Luxurious bow”
And it seems that what else can be made from hair, relying only on the ability to make ordinary trivial buns? But no! Using your imagination, you can create a simply fabulous miracle on the head of a little charmer - a luxurious huge bow!

And, most importantly, although the owner of such a miracle looks truly gorgeous, these are easy and quick to do for every day. The photo proves how great the little coquette's head looks with such a hair bow. Making it is quite simple. This is how simple hairstyles for little girls for every day are done step by step.
- The hair is all secured with an elastic band on the top of the head.
- A small strand from the front bun is separated and pinned temporarily with a tuck.
- The bases are secured with a second rubber band.
- Using your hands, the loop between the elastic bands is divided in half and moved apart in different directions - you get bow loops.
- The temporarily pinned strand is released and laid back through the “bow”.
- At the base of the hairstyle at the back it is secured with bobby pins.
- The resulting ponytail at the back from the remnants of the bun needs to be twisted and hidden in the loop of the bow.
Braid - girlish beauty!
And who will argue? From time immemorial, beauties have been proud of their braids! Only if earlier they were woven in one version, today there are a huge variety of weaving methods! Braids are laid along the head, wrapped in ponytails, and they are even used to make the brim of hats!

The simplest hairstyles for girls for every day to school based on braids look beautiful and do not interfere with schoolwork. You can make traditional hairstyles with regular weaving:
- one braid at the back;
- one side braid;
- two braids;
- “basket” of two braids at the back;
- loops made from braids above the ears;
- “shells” over the ears made of braids.
All of the above options have existed for a very long time. Our grandmothers also used such hairstyles, and maybe grandmothers’ grandmothers too... And today, many simple hairstyles for little girls for every day are made on the basis of traditional weaving. Although some fresh ideas still have a place here.

For example, little kids really like braids, which are woven in huge quantities! Only first, the hair is made into tight fountain buns with multi-colored elastic bands so that they stick out perpendicular to the head. And they are already plaited into braids. The use of a wide variety of hairpins and decorations only emphasizes children's spontaneity and penchant for mischief and fun.
Convolvulus braids
Many girls get so bored with the same hairstyles, especially braids. And mothers simply don’t know how to braid their beauty differently. There’s nothing complicated here, by the way! These are the simplest hairstyles for girls for every day. The process looks like this step by step.

- A strand is separated from the hair from which the braid is to be woven.
- The braid can be braided in any convenient way.
- An elastic band is attached to the tip.
- The strand separated in advance is slightly twisted with a flagellum.
- This plait is wrapped around the pigtail.
- Both the harness and the braid are connected together and secured with a beautiful hairpin, bow, ribbon, kanzashi - whichever you like best.
French braid - neatness and beauty!
It often happens that a girl suddenly decides to change her image. Until recently she wore bangs, but now she wants to open her forehead. But - alas... My bangs, which have already grown quite long, constantly fall on my face and interfere with watching, writing, reading, drawing, sewing, and gluing.
And then French braiding will become a lifesaver. Thanks to her, even short hair will be neatly woven and will not fall out of the hairstyle. And it’s not difficult to learn this!

- Start weaving in the same way as usual. Only you need to divide not all the hair into three strands, but part of it from the middle.
- Having made two spans, you need to grab a small strand of hair, located not far from the braid, along with the outer strand.
- The same is done with the other extreme strand.
- Again, two spans are made in the usual way.
- The weaving algorithm with tack is repeated again.
- This should be done until all the hair is included in the braid.
- If you need to lay a braid around your head, the process is complicated by the fact that the braiding is laid in the desired direction.
Pigtail with a “cap”
The hairstyle, which is based on French braiding, looks simply luxurious. You can make a braid around the bun. This hairstyle is somewhat reminiscent of a hat, and it is appropriate to place a beautiful bow or artificial flower in the center of it.

- To work, the strand on the top of the head is gathered into a ponytail with an elastic band.
- One strand is taken from the bun, the second is separated from the hair near the base of the ponytail.
- After the strands overlap, they grab the still free hair, forming a third strand from it.
- Next, French braiding is performed with grabs from the bun and from loose hair. The braid itself is laid around the circumference of the head from the forehead to the back of the head.
- The braid should reach the hollow above the neck. Exactly half of all hair should be woven into it.
- The French braid is done in the same way on the other side.
- Now all the hair is connected into one bun. Next, the braid is braided in the usual way.
If you do the braiding not from two points, subsequently connecting two braids into one, but do the work in a circle, you can get a charming hat.

In this case, you should start your hairstyle from the bottom. The braid will go around the entire circumference of the head and go down to the place where it originated. Here it is woven in the usual way. Now the braid is secured at the end with an elastic band. Everything unnecessary is hidden under the weaving. You can additionally secure your hairstyle in this place with a beautiful hairpin.
Hairstyle with a “donut” - quickly done, looks charming!
Today, many different devices have been invented for performing hairstyles. For example, a “bagel” will help you pull your hair into a luxurious “babette”, like that of grown-up ladies. And it will take at most five minutes to style your hair.
- All hair must be collected in a bun. If desired, you can use an elastic band.
- Having pulled the bun into the middle of the “donut”, the device is raised to the ends of the hair.
- The ends of the bundle are turned outward, wrapped around the “donut”.
- Now, with a rotational movement, the device is lowered to the base of the “tail”. This process is accompanied by winding the beam onto it. Use your fingers to carefully distribute the hair in a circular pattern into a donut shape.
- When the “babette” turns out to be tight enough, you need to lay out your hair again. The “donut” should not show through the strands.
Whatever hairstyle they decide to give the girl, you should remember: she should not “pull” the hair or cause pain or inconvenience to the baby. And if a girl goes to kindergarten and goes to bed there, then the simplest hairstyle that suits her best, which can be easily done by a nanny or teacher after a “quiet hour.”