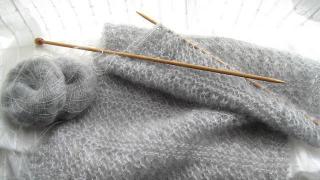
Mohair yarn is one of the lightest, but at the same time warm knitting threads. It is made from goats. The name muyhyar itself means “selected fleece,” which already indicates that this material is of high quality. Special processing technology makes the yarn thin and delicate. knitting brings true pleasure to needlewomen, the result of which will be light, beautiful things. Readers can learn about the properties of this thread and the features of working with it in this article. Also here are descriptions of the making of mohair clothing and photographs of finished products. Focusing on them, craftswomen will be able to knit wonderful warm outfits for themselves and their loved ones.
Properties of mohair yarn
Thread made from Angora goat fur has a number of advantages:
- Hypoallergenic. The high-tech mohair production process produces yarn of excellent quality. Natural mohair does not cause any allergic reactions. Even if a thing made from this type of thread is put on a naked body, then no itching, no redness, or any other irritation of the skin will occur.
- Comfort. Things knitted from mohair yarn retain heat well. At the same time, it does not get hot in them, since the canvas easily allows air to pass through.
- Strength. Despite the fact that natural mohair thread is very thin, it is very difficult to break. And the fabric knitted from it retains its shape and structure well throughout the entire period of wear.
- Wear resistance. During washing and drying, it is important to follow all the rules for performing these procedures, then the product will not deform (do not stretch or fall off). Mohair lends itself well to painting with special means, with subsequent good performance properties, that is, the color does not wash off or fade when processing the product.
- Ease. Knitting from mohair allows you to get almost weightless items. A shawl, cardigan, sweater, beret or other wardrobe items made from this type of thread are practically not felt on the body, but at the same time they warm well and create a festive and gentle look.
- Safety. The mohair thread slowly gets wet. This feature can be very useful if you are caught in the rain. A sweater or jacket made of mohair can save the body from hypothermia for some period of time. Yarn of this type ignites slowly, which is also another advantage.
Classification of mohair yarn

The main types of mohair threads are divided into types depending on the age of the animal or whose wool is the source material. Kid Mohair yarn is the thinnest and most delicate. The thickness of the fibers is no more than 27 microns. This thread is made from the wool of kids that are sheared for the first time. It is used to make air shawls, stoles, scarves, and children's items. Knitting with kid mohair can be compared to weaving lace. The products look like thin cobwebs.
As a result of shearing animals, which are between 1 and 2 years old, wool is obtained from which Goatling yarn is made. It is a little thicker and stiffer, but this does not impair its qualities and properties. It is used to make sweaters, vests, cardigans, dresses and other types of clothing.
As a result of processing, the wool of an adult goat (from 2 years old) turns into Goatling mohair. This thread differs from the previous ones in a higher degree of rigidity and strength. At the same time, it retains all the properties of mohair. Its thickness is 30 microns. In addition to clothing items, yarn is used to make blankets.
Composition of mohair yarn
To ensure that the natural wool fibers of the thread keep their shape well, they are spun with the addition of cort, a material that holds the hairs together. Therefore, it would be incorrect to say that mohair is 100% wool thread. Today's technologies make it possible to produce yarn containing 83% Angora goat wool. If you see yarn with a larger number indicated, know that this is a fake and knitting from mohair (this kind of “mohair”) most likely will not bring you any pleasure. A combination of thread with other types of yarn is allowed. In this case, goat hair makes up from 10 to 80% of their total amount, which must also be indicated on the label.

If you decide to make a product from this type of thread with your own hands, then be sure to take note of the following recommendations.
Having decided on the model of the future product, you need to choose yarn and knitting needles. When purchasing thread, carefully study the information on the label attached to the skeins. If the composition of the thread suits you, pay attention to the recommended knitting needle size for the job. The quality of the future knitted fabric depends on them. mohair is obtained by using a tool whose thickness is 2-4 times the thickness of the yarn. A warmer and denser fabric is made with a small number of knitting needles.
Before you start knitting a mohair pattern, practice your chosen pattern. At first, it may be difficult for novice needlewomen to work with such a thin and soft thread, but after knitting several rows of a sample, your hands will “understand” with what tension to hold the yarn and how tightly to tighten the loops. After this, you can start making the product itself.
The next part of the article presents models of clothing items that can be knitted from mohair. Focusing on them, you can make such beautiful and warm things as a scarf, sweater and jacket with your own hands.
How to knit a scarf?
Knitting a mohair scarf with knitting needles using knitting technology is no different from making it from another type of yarn. When calculating the loops, keep in mind that the thread is thin, so their number will be greater than if you knitted a product of the same size, but from a larger one. in two or even three folds with patterns of front and back loops: elastic bands of different types, pearl pattern, “checkerboard”. Then the canvas will be voluminous and very warm. Light women's scarves reminiscent of lace are knitted into one thread. They are used more as a decorative addition to the overall image. Mohair is used to make such accessories. The photo shows a diagram of one of these drawings. A scarf or handkerchief made by him will turn out weightless and very delicate.
Knitting a fluffy warm sweater

The model of this wardrobe item, the manufacturing process of which is described below, belongs to the “unisex” style. It will suit both men and women. Based on the calculations given in this master class, you will end up with a size 48 sweater.
To work, you will need knitting needles on fishing line No. 5 and 400 g of mohair/wool/polyamide yarn (100 m/50 g).
Knitting sweaters made from mohair or any other yarn starts from the bottom edge. To make this model, cast on 82 stitches. Start working on creating the front part. Work the rib stitch by alternating one knit stitch and one purl stitch. Knit this pattern until the width of the bar reaches 6 centimeters. Next, proceed to the front stitch. Knit the fabric in a straight line until the total length of the piece is 57 cm. Now make decreases to form the neckline. To do this, close the central 8 loops, and then knit each front separately, continuing to reduce the number of loops to round it off. In every second row, from each inner edge, close 2 loops 1 time and 1 loop 3 times. After this, close the loops that remain on the knitting needles. The total height of the fabric should be approximately 64 cm. Knit the back piece in the same way, but only for the neckline at a height of 64 cm, close the central 12 loops, and 3 loops on each edge once.

Next we knit sleeves from mohair. Cast on 32 loops on the knitting needles and make 1 x 1 strip 5 cm wide with an elastic band. In the last row, add 24 loops at equal distances from each other. Continue knitting the sleeve using regular stockinette stitch, making additions to form a bevel. To do this, on both sides of the part, add 1 loop 13 times in every 4th row, and then 1 loop 4 times in every 2nd row. When the sleeve length reaches 44 cm, finish the work. Tie the second part in the same way.
Knitting the mohair model is finished. Now start assembling the product. Connect the front and back pieces together at the shoulder seams. Next, pick up the loops along the neckline on the knitting needles and knit 6 cm with an elastic band, forming an edge. Sew the sleeves and sew them into the sweater. The last to be made are the seams along the side lines of the product. Hide the ends of the threads on the wrong side. The fluffy warm sweater is ready!
The description presented is a guide to making a classic sweater model. If you need a larger product, increase the number of loops initially. To make the pattern smaller, reduce the number of stitches in the cast-on row accordingly.
Experienced needlewomen can make a sweater not with stockinette stitch, but with any other desired pattern. Patterns made from strands or braids look good on mohair products. They also fall into the category of patterns suitable for women's and men's products.
Knitting mohair sweaters
The next master class tells you how to make a women's sweater with knitting needles for sizes 42-44. This model is knitted with double thread (yarn consumption - 100 g/200 m), which contains 70% mohair and 30% acrylic. It is recommended to use knitting needles No. 4, 7, 9, as well as circular knitting needles No. 9.
The product is made using two patterns - stockinette stitch and How do we knit them? Schemes for the implementation of these drawings, as well as symbols, are shown in the photo below. Let's look at the sequence of making the parts of the jacket and assembling them into a whole product.

To knit the back, you need to cast on 59 stitches on needles No. 7. Knit them in stockinette stitch, decreasing on the sides in every 10th row, 1 loop 3 times. As a result of this work, 53 loops will remain on the knitting needles. When the height of the piece reaches 28 cm, add 1 loop from each edge 3 times in every 8th row. And again there will be 59 loops left on the knitting needles. At a fabric height of 46 cm, start making armholes. To do this, cast off 3 loops on both sides of the product, and then in each 2nd row, 1 loop 3 times. As a result, 47 stitches remain on the knitting needles. To form the neckline, bind off the middle 17 loops at 18 centimeters from the beginning of the armholes. To round, make additional decreases along the inner edges of the neckline 2 times, 2 and 1 loop in every second row. When the height of the back piece reaches 66 cm, make bevels on the shoulders. To do this, on each shelf, close 5 loops 2 times in every 2nd row. Finish your knitting here. The total height of the product will be approximately 68 cm.
So, we are gradually mastering simple knitting of mohair sweaters. Next, we proceed to the design of the right shelf of the front part. On knitting needles No. 7, cast on 4 stitches and knit stockinette stitch, while adding on the right side (where the clasp will be) in every second row 3 times for 1 loop, 7 times for 2 and 4 times for 1 loop. At the same time, perform the fitting in the same way as you did on the back part. When the height of the shelf is 42 cm, make decreases to form the neck. To do this, decrease 1 loop in every 4th row after the edge row 9 times. At a piece height of 46 cm, cast off 3 loops to make the armhole, and then in every second row - 3 times 1 loop. When the total height of the piece reaches 66 cm, bevel the shoulder in the same way as the back piece and finish knitting. Make the left shelf symmetrically with the right one.

We continue knitting from mohair by decorating the sleeves. Now we take tool number 9 and cast on 39 loops. Knit the fabric, alternating the "English rib" (11 cm) and "knit stitch" patterns using knitting needles No. 4 (3 cm). When the piece reaches a height of 59 cm, stop changing patterns and tie the product only with an English elastic band. At the same time, make decreases along the edges to form a sleeve cap in every second row 1 time - 2 loops, 7 times - 1, and 1 time - 2 loops. Cast off the remaining 11 stitches on the needles. The total height of the part will be approximately 70 cm. Knit the second sleeve in exactly the same way as the first.
The next stage is assembling the parts of the sweater into a single product. Sew the sleeves and stitch them in the right places. Next, connect the parts of the back and shelves along the lines of the shoulders and sides. Now start knitting a wide border. To do this, pick up 252 loops on circular needles No. 9 along the entire edge of the sweater and knit a strip 18 cm wide with an English elastic band. Next, close the loops and cut the thread.
Options for other products according to the same description
You will get an elegant, warm, soft and very stylish jacket as a result of such a fascinating type of needlework as knitting. A mohair cardigan, a coat, a sleeveless vest - these are the things that you can do based on the master class above. Increase the height of the shelves and back parts to your desired size, and the product will be longer. These will already be blanks for an elegant cardigan or an original coat. It will be even easier with a sleeveless vest. Instead of sleeves, carefully tie the armholes with several rows of English elastic and close the loops.
Rules for caring for items knitted from mohair yarn

Knitting from thin mohair is a rather labor-intensive activity, but very exciting. To ensure that items made with your gold hands last a long time, it is important to properly care for them. Wash them by hand in warm water (30-35 degrees) with the addition of detergent for woolen items. You can use regular shampoo instead. Do not wash mohair in a machine, and especially do not use the “Spin” function. After soap treatment, rinse the product thoroughly in several waters and squeeze lightly with your hands. Next, lay it out on a horizontal surface, straightening out all the parts. Place a sheet folded several times or a fluffy towel under the product. They will absorb moisture. Dry the mohair item in a warm place. Avoid direct sunlight. Turn the clothes over to the other side from time to time. If the product is wrinkled, wrap it (while wet) on a rolling pin or towel folded into a roll and gently roll it on the table. Then carefully spread it out again and leave it to dry completely.
Conclusion
Knitting? The diagrams, descriptions, and recommendations given in this article will help all needlewomen master the technology of making products from fine mohair yarn. We wish you successful mastery of new knowledge and skills in this craft, beautiful and original works and easy loops!
Mohair is the favorite yarn of many fashionistas and a truly unconquered peak for most knitting fans, because working with this yarn is quite complex and requires increased attention. Pullovers, cardigans, blouses, hats, stoles, jackets or snoods - all this will look original if you choose mohair for knitting.
This yarn attracts novice needlewomen with its beauty and characteristic visual and tactile qualities - airiness, softness, weightlessness, and professional knitters love this yarn made from Angora goat wool for the ability to perform interesting work and complex patterns.
The versatility of mohair lies not only in a rich color palette, because this yarn absorbs colors remarkably well, but also comfortable to wear both in cold and warm seasons: in winter it warms and prevents you from freezing, and in summer it absorbs moisture and protects you from overheating. And the most pleasant quality of the yarn, which is why many people choose for knitting, is hypoallergenic— it does not irritate even the most sensitive skin. It is important to know here that mohair often includes no more than 83% of Angora goat wool, the rest of the composition is supplemented by sheep wool, silk, and acrylic.


This soft material is divided into three subtypes:
- Kid Mohair- the most delicate thin mohair, which is preferred when knitting openwork products;
- Gatling - denser yarn obtained from kids up to two years old, which is selected for dense patterns for a variety of models of knitted items;
- Adult Mohair- dense thick threads that are good for working with simple large knitting.
The final result depends on the choice of yarn, because if you choose dense mohair for delicate patterns, the product will look inorganic, and you most likely will not want to wear it.
Knitted patterns from mohair with knitting needles - diagrams and descriptions

Professionals say that you can knit almost any model of clothing from mohair, you just have to find the right patterns and description of the work progress. Knitting with mohair needles can be made much easier by if you use the golden rule: For thin yarn use thin knitting needles, for thick yarn use large knitting needles. The tension of the mohair threads must be constant, otherwise the result will be uneven, loose and stretched.
A fundamentally important point in this work is the correctly selected pattern and description of mohair knitting. Let's try to consider several options for patterns of varying degrees of complexity for different clothing models.
Hat for woman

Perhaps this is not the most original model of a knitted mohair hat, but it is already a proven classic that is suitable for women, children, and even young people, because this model of hat is now popular among men as well. Knitting mohair with knitting needles for women is not difficult, you just have to carefully study the diagram and description of the work.
We knit a hat with jacquard stripes for a head circumference of 54–57 (57–60) cm
Width and length of mohair hat: 22 (24) cm.
For this model you will need 2 types of yarn: 1) 1 skein of gray (main color), 1 skein of white (finishing color 1) 100% wool; 100 g/575 m; 2) 1 skein of green (finishing color 2) 66% mohair, 4% wool, 30% polyamide; 50 g/500 m; as well as circular knitting needles No. 4 and No. 5.5, 40 cm long.
Work process:
We knit an elastic band alternately knit 1, purl 1.
Facial surface: In circular rows, knit only facial loops.
Jacquard pattern: knit according to the pattern in stockinette stitch. The color distribution is indicated in the description.
Knitting density: 20 p. x 19 r. = 10 x 10 cm, knitted with a jacquard pattern on knitting needles No. 5.5.
Knit pattern in 2 threads = finishing thread 1 + finishing thread 2, taken together.
Diagram and description:

On knitting needles No. 4, cast on 72 (80) sts with a thread of the main color and knit 18 r in the round. with an elastic band.
Switch to knitting needles No. 5.5 and perform 3 rows. with the front stitch, while in the 1st r. row evenly add 0 (4) sts = 72 (84) sts.
Decreases:
continue knitting with a thread of the main color, while binding off every 6th stitch (knitting 2 stitches together with the front one) = 60 (70) stitches.
After 5 r., knitted with a thread of the main color, knit 1 r., alternating 1 p. with a thread of the main color and 1 p. with a thread of the finishing color.
Next, knit to the end with a finishing thread: in the 4th row. after decreasing, bind off every 5th st. = 48 (56) sts, knit 3 r. knit, covering every 4th st. = 36 (42) sts, knit 3 r. knit, covering every 3rd st. = 24 (28) sts, knit 3 r. knit, covering every 2nd st. = 12 (14) sts.
Pull the yarn through the remaining loops. Fasten the ends of the threads.
Make a pompom from finishing thread and sew it to the hat.
Knitting a sweater

A knitted mohair sweater can come in a variety of variations, from modest and classic to bold and shocking. It’s no wonder that designers and couturiers from all over the world love to use mohair yarn when implementing the most daring sketches! At the same time, mohair sweater models can look playful, flirty, gentle, and strict. That is why it is worth trying to knit at least one model from mohair.
We knit a sweater on size: S (M) L (XL).
Width mohair product according to chest circumference: 05 (113) 121 (129) cm.
Length will be: 65 (69) 73 (77) cm, respectively.
To make a sweater you will need: Yarn 1 (100% cotton; 50 g/220 m) - 4 (5) 5 (6) skeins of menthol color; yarn 2 (70% mohair, 30% silk; 25 g/210 m) - 4 (5) 5 (6) skeins of menthol color; knitting needles No. 5 and 6; circular knitting needles No. 5, 60 cm long.
Patterns and schemes:
Facial surface: Front rows - front loops, purl rows - purl loops.
The elastic band must be knitted alternately: knit 1, purl 1.


How to knit a heart pattern:
16 p. x 22 r. = 10 x 10 cm, knitted in stockinette stitch using needles No. 5 in 2 strands (= one strand each of yarn 1 and yarn 2).
Completing of the work:
Back:
On needles No. 5 in 2 threads, cast on 85 (91) 97 (103) sts and knit with a curly elastic band:
1st row (= purl row): knit. edge (in all rows), *p1, k1*, repeat from * to *, finish p1, k1. chrome 2nd row: knit stitches. Repeat these 2 rows for a total of 21 rows. Then switch to needles No. 6 and continue working in stockinette stitch (1st row = knit row).
Important:
Switch to thread from a new skein at the beginning or end of the row. Tie a knot and secure the end of the thread to the edge.
When the length of the part is 42 cm (applies to all sizes), close on both sides for the armholes with 4 stitches.
Then decrease 2 stitches on both sides in every 6th row. (= front rows): chrome, knit 3 stitches together, knit until the last 4 stitches on the knitting needle, remove 2 stitches one at a time, as in knitting, knit 1 stitch and pull the removed loops through the knitted stitch , chrome
After decreasing in total 6 (7) 8 (9) times, knit 4 rows. directly.
Then close off 1 stitch on both sides and transfer the remaining 51 (53) 55 (57) stitches to the auxiliary needle.
Before:
On needles No. 5, cast on 85 (91) 97 (103) sts and knit with a curly elastic band.
1st row (= purl row): edging, *k1, purl 1*, repeat from * to *, finish with knit 1, edging.
2nd row: knit stitches.
Repeat these 2 rows, knit 21 rows in total.
Then switch to needles No. 6 and knit 18 (21) 25 (29) r. stockinette stitch (1st row = knit row).
Then knit in a pattern according to the pattern (1 square = 1 p. x 2 p.).
At the same time, when the length of the piece is 42 cm (applies to all sizes), close the loops for the armholes in the same way as described for the back. Finish the front like the back.
Sleeves:
On knitting needles No. 5, cast on 33 (37) 41 (45) sts and knit 21 r. with a curly elastic band, as described for the back.
Switch to needles No. 6 and knit in stockinette stitch, adding 1 stitch on both sides in the 1st row, then 1 stitch in every 4th row, increase in total 14 (15) 16 (17) times = 63 (69) 75 (81) p.
Then cast off 4 stitches on both sides. After this, decrease 1 stitch on both sides in every 2nd person. row: chrome, knit 2 sts together, knit until the last 3 sts on the knitting needle, remove 1 st as a knit stitch, knit 1 st and pull the removed loop through the knitted one.
In total, perform decreases 20 (23) 26 (29) times, finish with purl. next to it and bind off 1 stitch on both sides in this row.
Transfer the remaining 13 stitches (applies to all sizes) to an auxiliary needle. Knit the second sleeve in the same way.
Neck trim:
Transfer the remaining stitches of all parts to circular needles No. 5 in the following sequence: sleeve, front, sleeve, back and knit in the round with a figured elastic band:
Row 1: *K1, P1*, repeat from * to * until end of row.
2nd row: knit stitches.
Repeat these 2 rows, complete 8 rows in total. and close the loops in the next row.
Assembly:
Sew raglan seams (use cotton threads or cotton yarn of the appropriate color). When switching to a new thread, first tie the ends of the threads in a knot, then secure. Sew side seams and sleeve seams. Lightly moisten the product and leave until dry.
Jacket with openwork pattern

What to please yourself with before the onset of the cold season? You can knit an interesting striped blouse with an openwork pattern! A soft and delicate jacket will not only undead and decorate a girl or woman, but will also warm you up. Isn't it lovely? Important: This special pattern also requires crochet skills.
A sweater knitted from mohair with an openwork pattern is suitable for sizes: S (M) L (XL) XXL.
To work you will need:
Yarn 1 (100% wool; 50 g/225 m) - 3 (3) 4 (5) 6 skeins of lavender color;
yarn 2 (70% mohair, 30% polyamide; 25 g/225 m) - 2 (3) 3 (3) 4 skeins of light purple; knitting needles No. 3,5 and 4; circular knitting needles No. 2.5 and 3, 40 cm long; circular knitting needles No. 3.5 and 4, lengths 40, 60 and 80 cm; hook No. 2.5.
Front rows- front loops, purl rows - purl loops.
Important:
The product is knitted from top to bottom from the neckline to the armholes on circular needles in the round, then from the armholes the front and back are knitted in the round. The sleeves are knitted from the armholes in rows in forward and reverse directions on straight needles.
We knit an openwork pattern according to the diagram and description:
Decrease 1: slip 1 st as a knit stitch, knit the next stitch and pull the removed loop through the knitted one.
Stripes: Knit on needles No. 4 – 12 r. openwork pattern with yarn 2 in 1 thread, then on knitting needles No. 3.5 - 12 r. openwork pattern with yarn 1 in 1 thread. Repeat these 24 rows constantly.
Knitting density: 22 p. x 30 p. = 10 x 10 cm, knitted with an openwork pattern (according to the diagram) with a stripe effect.


We do the work:
Start from the neck. On circular knitting needles No. 2.5 with yarn 2 in 2 threads, cast on 142 (150) 150 (158) 158 sts and knit 2 rows in a circle. purl. Next, knit with only 1 thread.
Switch to circular needles No. 3. Mark the beginning of the raglan increases: from right to left, count 45 (47) 47 (49) 49 p. (= back), mark the next 2 p., count 23 (25) 25 (27) 27 p. (= right sleeve), mark the next 2 sts, count 44 (46) 46 (48) 48 sts (= front), mark next 2 sts, count 23 (25) 25 (27) 27 sts (= left sleeve), mark first and last stitches row.
Important:
Work the next round on circular needles No. 3, then switch to circular needles No. 4 and perform the 1st strip with yarn 2.
Continue knitting in the circle with an openwork pattern (distribute the pattern for each piece separately). 1st r. openwork pattern begin and end (for the back, front and sleeves) according to the arrows in the diagram.
At the same time, perform raglan increases - 1 increase on both sides of the 2 marked loops = a total of 8 increases per row.
Repeat raglan increases every 2nd r. Knit in stockinette stitch on marked stitches. Include the added loops in the pattern as soon as possible (before that, knit on them in stockinette stitch). Knit strips at the same time, changing knitting needles and yarn (see above). Continue stripes until the end of the product.
In total, perform 26 (28) 30 (32) 34 raglan increases on each side = 98 (104) 108 (114) 118 stitches for the back and front and 77 (83) 87 (93) 97 stitches for the sleeves. The number of loops includes 2 marked loops, which are taken into account when counting the loops for each piece.
Leave the sleeve loops temporarily and continue working on the back and front loops.
Back and front:
Knit on circular needles in the round. On both sides, cast on 3 (4) 6 (6) 8 sts for armholes = on knitting needles 202 (216) 228 (240) 252 sts and continue working in the round.
Knit stripes in an openwork pattern on those loops that can fit into the pattern - there may be loops on both sides that won’t fit into the pattern; knit on them in stockinette stitch. Knit until a total of 8 repeats of stripes are completed from the neckline (= 12 rows of openwork pattern with yarn 2, 12 rows of pattern with yarn 1 = 24 rows in total, knitted 8 times). The last strip is knitted with yarn 1. Close the loops.
Sleeves:
Number of loops = 77 (83) 87 (93) 97 sts, knit with needles No. 4 in rows in forward and reverse directions. At the beginning and end of the row, cast on 2 (2) 3 (3) 4 loops for the armhole = 81 (87) 93 (99) 105 loops.
Continue working in rows in forward and reverse directions. Knit stripes in an openwork pattern on those loops that can fit into the pattern - there may be loops on both sides that won’t fit into the pattern; knit on them in stockinette stitch. All rows begin and end with faces. chrome loop.
After 2 cm from the armhole, start making decreases at the beginning and end of the next person. row: persons. chrome, knit 2 stitches together, knit until the last 3 stitches on a knitting needle, decrease 1, knit. chrome
Repeat decreases every 10th r. (8th r.) alternately in every 6th r. and every 8th r. (every 6th r.) alternately in every 4th r. and every 6th r. - complete 13 (16) 18 (21) 23 times = 55 (55) 57 (57) 59 p.
Knit until a total of 8 repeats of stripes have been completed (= 12 rows of openwork pattern with yarn 2, 12 rows of pattern with yarn 1 = a total of 24 rows, knitted 8 times), as on the back and front, + 1 additional strip with yarn 2. Sleeve length from armhole = 44 cm. Close all loops.
Knit the second sleeve in the same way.
Assembling a mohair sweater:
Sew the sleeve seams. Sew the sleeves into the armholes on the lower sections. Tie 1 p. around the neck. conn. Art. yarn 2 in 1 thread. Wash the product, lay it out and leave it to dry.
Mohair pullover - master class for beginners


An easy-to-make mohair pullover will always come in handy. In addition, this loose cut hides any figure flaws, and how warm it is, despite the openwork!
The pullover can be knitted in the following sizes: 38/42
To do this you will need: Yarn (43% natural wool, 22% silk, 22% mohair, 13% yak wool; 150 m/25 g) - 200 g color. rosewood; circular knitting needles No. 4.
Patterns and schemes
Openwork pattern: The number of loops is a multiple of 18 + 11 + 2 edge loops = knit according to. scheme. It shows facial rows. In purl rows, knit all loops purl or acc. instructions, always knit yarn overs purlwise.
Start with 1 edge loop and loop before the repeat, repeat the repeat all the time, finish with loops after the repeat and 1 edge stitch. Repeat rows 1–16 constantly.


Patent Edge: In the front row, knit 2 loops, in the purl row, remove 2 loops as purls, while stretching the thread before work.
Rubber: An even number of loops = in the front and back rows between the edge rows, alternately knit 1 front, 1 back.
Knitting density: 20 p. x 33.5 r. = 10 x 10 cm.
Important: Due to the large number of loops, we recommend knitting on circular knitting needles in rows in forward and reverse directions. Knit the pullover in one piece without shoulder seams, starting from the back. Arrow on pattern = knitting direction.
Pattern

We do the work:
Cast on 102 stitches for the back and for the placket, knit 7 cm with an elastic band, finish with 1 front row and in this last front row, evenly distributing, add 19 sts = 121 sts.
Then first purl 1 row. This series is not taken into account in subsequent calculations.
Continue working with an openwork pattern.
After 15 cm = 50 rows from the initial row, add 1 x 1 p. for the side bevel on both sides, then in every 2nd row 30 x 1 p. according to. pattern = 183 p.
After 55 cm = 184 rows from the starting row, the shoulder line is reached.
After this, leave the last 91 loops for the left front and on the first 92 loops of the row continue to work for the right front as follows: edge, 90 stitches in an openwork pattern, from the transverse thread add 1 knit crossed and this loop, as well as the last loop of the row, then knit with a patent edge on 2 loops = 93 p.
After 54.5 cm = 183 rows from the shoulder line, i.e. after the front row, leave the loops.
Then include in the work the remaining 91 loops for the left front and knit in a mirror image, while in the 1st row along the right edge (= edge of the neckline) add 2 sts = 93 sts.
After 54.5 cm = 183 rows from the shoulder line, also leave loops.
Then knit 1 purl row with a single fabric on both fronts as follows: knit 67 loops of the left front, place the first 26 loops of the right front behind the last 26 loops of the left front and constantly knit 1 loop of the right front with 1 loop of the left front together, purl the remaining 67 right front loops = 160 sts.
Mohair is a special soft yarn that consists of more than 80% goat hair. What can you knit from mohair? Almost everything! Any item knitted from such yarn turns out to be a real work of art. But it’s not so simple - working with this type of yarn is not very easy, so many needlewomen don’t even take it up. Let's try to convince them otherwise.
Mohair - pros and cons
Mohair gained its popularity thanks to the special structure of the thread. Things knitted from mohair fabric can be worn both in the winter cold and in the summer heat. In winter, yarn retains heat well, but in summer it protects the body from overheating.
Another undeniable advantage of mohair yarn is its hypoallergenicity - working with it will in no way harm the skin of your hands, even the most sensitive ones. Not least of all is the rich color palette of mohair yarn.
Patterns and patterns for knitting mohair are not much different from patterns for other yarns. There are such a huge number of them that sometimes it can be very difficult to make a choice.
In this case, it is necessary to take into account the fact that mohair yarn can be of 3 types:
- ultra-thin;
- thin;
- thick.


Thick yarn is ideal for creating items such as scarves, hats and coats. But thin mohair is an excellent solution for children's clothes and such elegant items of women's wardrobe as shawls and capes.
The thickness of the yarn only affects the appearance of the final result. But this factor in no way affects the complexity of the work. Despite its softness and even weightlessness, mohair yarn has a high margin of strength, which is also its undeniable advantage.


Where to begin?
The first step is to decide what kind of item to knit from such a wonderful yarn as mohair. It should be noted that this is not an easy task.

What can you knit from mohair? Mohair is such a versatile yarn that you can knit anything from it. The most common items knitted from mohair are:
- pullovers;
- dresses;
- socks;
- capes;
- shawls and others.

Having decided on the type of product you plan to knit, you should choose a pattern for it. Mohair is so beautiful that even the simplest garter or stocking stitch will look especially beautiful. Photos of mohair knitting, of which there are a lot on the Internet, will help you choose the ideal option. The main thing is not to make a mistake when choosing yarn, or rather, its thickness.

Even the most delicate and beautiful pattern will look awkward if done with thick threads. Therefore, when knitting with mohair, you must pay enough attention to the details.
Original knitting from mohair gives the item a unique look, making it light and weightless. But only with the right choice of yarn, pattern, and knitting needle size.
Knitting with mohair yarn
The question of how to knit with mohair correctly is of interest to all needlewomen, without exception, who are just beginning their acquaintance with this wonderful material. One of the basic rules when working with mohair thread is that its thickness should correspond to the thickness of the knitting needles, then the product will look neat.
During the knitting process, the thread should be constantly under tension so that the pattern is not too loose and unclear. After choosing a product, its model and pattern, the time comes to start knitting directly.
Let's look at how to knit a mohair sweater. This brief instruction for knitting mohair with knitting needles will help beginner knitters navigate the sequence of actions. Let's start by knitting the back.
It is best to knit the bottom of a mohair sweater with an elastic band or regular stocking stitch - in this case, the edge will curl a little and will look very interesting. The sweater collar can also be knitted in a similar way.

The calculation of the required number of loops is determined in a standard way, and the pattern must be knitted as carefully as possible; mistakes are highly undesirable. This is due to the fact that it is not easy to unravel a mohair product - thin threads constantly get tangled and lose their shape. All parts of the sweater are knitted as usual, and then connected to each other in a convenient way.
Before you start working with mohair yarn, you can watch master classes on knitting with mohair needles - this will help you avoid many common mistakes and save time.
A little patience, perseverance, diligence and soon knitting from mohair will bring a lot of positive emotions. And things knitted with your own hands will not only warm you up, but also lift your spirits.
When starting to work with mohair for the first time, it is advisable to use step-by-step knitting of mohair with knitting needles with a description. Such articles usually describe everything down to the smallest detail - from the required thickness of yarn and number of knitting needles to finishing the edges of the finished product. For beginning craftswomen, this is a real find.
Photo of mohair knitting


As the end of 2017 approaches and the cold weather sets in, it’s time to replace your wardrobe with warm women’s outfits. Few people want to take out last year's stretched sweater or cardigan, but showing off fashionable models of women's clothing is the desire of every woman, especially if the product is made with her own hands. And by showing desire and effort, the created masterpiece will turn out fashionable, attractive, and will ideally emphasize your figure and image.
Knitting trends for women for 2017-2018
Fashion welcomes autumn with long sweaters with elaborate patterns in the form of intertwined braids or plaits. It becomes relevant to complement such products with a high collar or a separate accessory in the form of a knitted collar (snood). Such elements may differ in coarse viscosity or color. Moreover, natural soft colors such as beige, white, gray and brown are welcome.
As for sizes, knitting patterns for beautiful women with patterns are offered in a loose fit. A loose outfit will allow you to hide some figure flaws and feel more relaxed. Fashion 2017 made changes when creating sweaters in the form of an openwork turn-down collar and fringe. These details will highlight the individuality of each handicraft. But the hats this season are distinguished by ordinary knitting (purl, knit, elastic, Moss pattern), with a tight fit and an elongated crown with a large pom-pom at the end. Mittens with a high elastic band on the wrist will help complete the set. They knit easily.
The peculiarity of knitted items is versatility
Knitted items are the only clothing that is present in the wardrobe in limited quantities. A pair of openwork summer blouses, two autumn-spring blouses and a winter sweater are enough. Moreover, these products can look great with trousers, a skirt, and jeans, which indicates their versatility. An experienced needlewoman, taking into account the variety of all her outfits, is able to knit a pullover, the style of which will highlight any style of clothing.
When starting to knit the chosen model, you need to pay attention not only to the density of the thread in order to make the product warm, but also to choose the right color. It is recommended to calculate the length; if you plan to wear new knitting items with low-rise jeans, then you should not skimp on yarn and time on an elongated style. But with insulated pants it will be comfortable in a short sweater. All that remains is to choose the appropriate pattern for the planned masterpiece.
Selection of threads and knitting needles
Beginner knitters first make mistakes when choosing threads and knitting needles. A discrepancy can disrupt the shape and volume of the pattern, knitting density and texture. It affects the work process and the quality of the yarn; the fate of the future product will depend on this. The range of knitting threads is very large; they can be made from 100% wool, synthetic fibers or mixed. Natural yarn meets its thermal properties; clothes made from it will warm you in any cold weather. Cashmere, angora and mohair are considered common. For summer models, it is customary to use cotton or linen; they produce clear openwork patterns.
You should also pay attention to the knitting needles; they are made from popular materials:
- steel;
- aluminum;
- plastics;
- tree.
Bone knitting needles are extremely rare, but they are considered expensive, but they are inconvenient to use due to their ability to bend. Steel knitting needles are considered reliable; they are durable and have a smooth surface that is convenient for loops to slide through. Aluminum ones are also strong, but leave traces of oxidation on the canvas. Wooden and plastic products are fragile and will constantly break in the hands of inexperienced craftswomen. When knitting, it is important to take into account the diameter of the knitting needles; it should be twice the thickness of the working thread. Then the relief patterns on the knitted item will be correct and even.
Knitting techniques
It is not difficult to learn to knit in the usual way, but there are many more knitting techniques, such as:
- patchwork (sewing separately connected elements of variegated colors into a single whole);
- enterlak (the technique is reminiscent of basket weaving, the knitted fabric forms diamonds, seemingly separated from each other, although it is solid);
- intarsia and jacquard patterns (knitting smooth fabric with a free-style color pattern);
- Irish knitting (creating convex patterns in the form of braids, cones, strands on a plain background);
- freeform (knitting complex individual curved elements and subsequently stitching them into a solid structure).
Using these techniques, you can create an individual, attractive piece of clothing that will make you pay attention.
Knitting patterns
Knitting patterns are made in a variety of ways, just like crocheting. Each catalog of knitted patterns provides a complete description of the technical process and includes a diagram. For a future sweater or dress, patterns should be selected according to the figure; for a thin outfit, it is better to use large elements (braids, plaits, leaves, etc.), but for overweight people, knitting with a small relief is suitable. A popular “honeycomb” pattern, it will help hide imperfections and slim your figure. The appearance of the product will depend on the choice of pattern.
Fashion detail: wide boat neckline, the depth of which can be changed.
Size 42 (46). Differing data for larger sizes are indicated in brackets (the pattern is given in Fig. 2)
Material: 300 (350) g
Patterns:
- facial surface
- openwork according to the scheme
- elastic band 3x3
Back. Cast on 74 (84) stitches on the knitting needles and knit an even fabric using stockinette stitch. After 27 cm from the bottom edge of the part, go to the openwork pattern and knit another 6 cm. Then, for the side bevels of the armholes, decrease 1 stitch along the edges of the fabric in each row 4 times every other row - 10 times. When the height of the knitted fabric reaches 43 cm, leave the loops of the last row (there are 46 of them on the knitting needle) open and slip them onto pins and break the thread.
Before tie like a back.
Sleeves. Cast on 54 loops on the knitting needles and knit 40 cm in stockinette stitch. Then switch to the openwork pattern and knit another 6 cm, after which you begin to make the bevels. Perform them as on the back. Leave the loops of the last row (26) open and slip them onto pins. Knit the second sleeve in the same way.
Assembly. Connect the back and front with the sleeves along the raglan lines. Then sew the side seams and sleeve seams. Transfer the open loops along the neckline from the pins to the knitting needles and knit a 10 cm high bar with an elastic band in a circle. Close the loops of the last row in a straight line, without pulling them together. Bend the strip to the wrong side and carefully sew along the base. The neckline will look “branded” if you design it like this: fold the placket onto the front side of the sweater, and attach the open loops to the base of the placket. You can put a very thin hat elastic in the same color inside the bar.
Suzanne
Due to the loose silhouette of the pullover, the given calculation of loops is suitable for three sizes.
You will need: yarn (75% mohair, 25% polyamide, 80 m/25g) - 425 g yellow-pink; knitting needles No. 4.5; short circular needles No. 4.
Rubber: alternately knit 2, purl 2.
Facial surface: front rows - front loops, purl rows - and back loops.
Knitting density: 18 p x 25 r. - 10 x 10 cm.
Back: cast on 146 sts and knit 3 cm with an elastic band, continue working in stockinette stitch. For narrowing, in the 7th r. knit the 29th and 30th stitches together, knit the 117th and 118th stitches together with a slant to the left (= remove 1 stitch as in stockinette knitting, knit 1 stitch and pull the removed stitch through it loop), mark the resulting loops. Repeat these decreases (marked loop and the previous one, respectively marked loop and knit the next one together) 22 times in each next 6th row = 100 p. After 60 cm from the bottom edge of the part, close on both sides for the armholes 1 time 3 p., 2 times 2 p. and 3 times 1 p. in every 2nd r. = 80 p. Knit straight. After 78 cm from the bottom edge of the part, close off the middle 26 stitches for the neckline and finish both sides separately. To round the neckline, close every 2nd p. 1 time 3 sts and 1 time 2 sts. Then close off the remaining 22 sts of the shoulder.
Before: knit like a back, but only 58 cm from the bottom edge of the part for a V-neck, divide the work in the middle and finish both sides separately. To bevel the neckline, decrease alternately in every 2nd r. and the next 4th p. 18 times 1 p. After 80 cm from the bottom edge of the part, close the remaining 22 p. shoulder.
Sleeves: cast on 38 sts and knit. satin stitch For bevels, add 18 times on both sides, 1 stitch in every 4th row. = 74 p. At a height of 32 cm, close on both sides to roll 1 time 3 p., 1 time 2 p. and 3 times 1 p. in each 2nd p., 5 times 1 p. in each 4- m r., 1 time 1 p., 1 time 2 p., 1 time 3 p., 1 time 4 p. and 1 time 5 p. in every 2nd r. Then close off the remaining 18 sts. For the flounce, cast on 38 sts along the bottom edge of the sleeve and knit with an elastic band (start and end with an edge loop). At a height of 2 cm in each purl track add 1 stitch (= 47 stitches), at a height of 3 cm in each front track add 1 stitch (= 56 stitches), at a height of 4 cm in each purl track add 1 p. (= 65 p.), at a height of 5 cm in each front track, add 1 p. (= 74 p.). Knit in a new rhythm - alternately knit 4, purl 4. Having knitted a shuttlecock 10 cm wide, close the loops.
Assembly: make seams. Sew in the sleeves, slightly lowering them. For the collar, cast on 119 stitches along the edge of the neckline and knit 2 rows on circular needles. facial and 1 p. purl loops, while in the 1st and 2nd r. in the middle of the front, knit 3 p. together, and also in the 3rd r. close the middle front loop = 114 p. Knit 2 more p. stitch stitch and 14 cm elastic, then bind off the loops.
Verena 1995-11
Saturday, December 15, 2007

You will need: 750 (800) g beige Belisana yarn (70% royal mohair, 15% wool, 15% polyamide, 115 m/50 g); knitting needles No. 3, No. 7 and No. 9; long circular needles No. 9.
Facial surface: persons R. - persons p., out. R. - purl P.
Patent pattern, faces. and out. R.(odd number of loops).
1st row (purl): chrome, knit 1, *slip 1 st with yarn over as purl, knit 1, repeat from*, chrome. 2nd row: chrome, slip 1 p. with a crochet as purl, * knit a loop with a crochet together, knit, 1 p. slip with a crochet as a purl, repeat from *, chrome.
Row 3: chrome, knit a double crochet stitch together, * slip 1 p. with a double crochet as purl, knit a double crochet stitch together, repeat from * chrome. Repeat 2nd and 3rd rows.
Patent pattern, circular r.(even number of loops).
1st circular row: * Slip 1 stitch as purlwise, purl 1st, repeat from *.
2nd round: * knit a loop with a double crochet together, remove 1 st with a double crochet as purl, repeat from *.
3rd circular row: * Slip 1 p. with a double crochet as purl, knit a loop with a crochet together purlwise, repeat from *. Repeat 2nd and 3rd rows.
Knitting density. Persons satin stitch, knitting needles No. 7: 11-12 sts and 15 r. = 10x10 cm; patent pattern, knitting needles No. 9: 9 sts and 18 r. = 10x10 cm.
Attention! Knit the jacket with thread in 2 folds.
Back: On knitting needles No. 7, cast on 59 (67) sts and knit 1 purl. R. purl, then knit. satin stitch, closing for fitting on both sides every 10th r. 3x1 p.; for this, at the beginning of the row after chrome. remove 1 p. as knit., 1 knit. and pull it through the removed loop; knit a row to the last 3 sts, knit 2 sts together knit, chrome. = 53 (61) p.
At a height of 28 cm from the cast-on edge, add 1 x 1 st on both sides, then in every 8th p. 2x1 p. = 59(67) p. At a height of 46(44) cm, close on both sides for armholes 1x3 p., then in every 2nd r. 3x1 p. = 47(55) p. At a height of 62 cm from the cast-on edge for the neckline, close the middle 23 p. directly and on both sides of them after 2 p. another 1x2 stitches. At the same time, at a height of 64 cm, close on both sides for shoulder bevels in every 2nd row. 2x5 p. (2x7 p.). At a total height of 66 cm, close all loops.
Left shelf: On knitting needles No. 7, cast on 4 (8) sts and knit 1 purl. R. purl, then knit. satin stitch, while for the front rounding from the left edge in every 2nd r. again dial 1x3, 7x2 and 4x1 p. At the same time, close from the right edge for fitting in every 10th row. 3x1 p. = 22(26) p. At a height of 28 cm from the cast-on edge, make a side bevel and at a height of 46 (44) cm, knit an armhole, as for the back, and at the same time, at a height of 42 cm, reduce 1x1 p. to bevel the neckline, then every 4th r. 8x1 sts. To do this, knit a row to the last 3 sts, knit 2 sts together. and chrome. At a height of 64 cm, tie the shoulder bevels, as for the back.
Right shelf: knit in mirror image. To reduce the bevel of the neckline after chrome. remove 1 p. as knits. 1 person and pull it through the removed st.
Sleeves: on knitting needles No. 9, cast on 39 (43) sts and * knit with a patent pattern of 11 cm = 20 r. then knitting needles No. 3 2 cm. satin stitch = 6 r., from * repeat 3 times, finish the work with knitting needles No. 9 with a patent pattern. Stripes of faces. In satin stitch, always start knitting from the purl row and end with the front row. At a height of 59 cm, close 1x3 sleeves on both sides to roll up, then in every 2nd r. - 1x2, 7x1 and 1x2 p. After 70 cm from the cast-on edge, close the remaining 11 (15) p. directly.
Assembly: straighten the parts, slightly moisten them and let them dry. Complete all seams and sew in sleeves. For the strap, cast on 252 (266) sts on circular knitting needles: along the lower edge of the back - 42 (48) sts, along the curves - 25 (29) sts, along the straight front sides - 26 sts, along the bevels of the neckline shelves - 42 p. and along the back neckline - 24 p. Knit with a patent pattern in circular rows of 18 cm, then loosely bind off all the loops.
Attention! The bar can also be knitted from 2 parts of faces. and out. R. To do this, start casting on loops from the bottom from the middle of the back and end in the middle of the back neckline (127 (135) stitches for each strap). Sew the sides of the planks; The seam at the bottom of the back is made from the back, along the neck of the back - from the faces. sides.