With their help, you can decorate your home or garden, as well as make beautiful and original crafts that will delight not only children, but also adults.
Most balloon crafts are quite simple and can be done with your children.
Here are some fun crafts you can create using regular balloons:
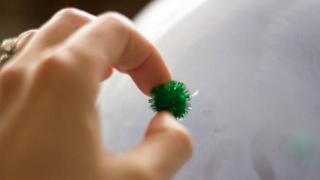
1. Balloon decoration
Glue a bunch of colorful pompoms to the ball.

2. Crafts from balloons

Decorate small vases with balls.
3. What can be made from a balloon: a holiday surprise

Surprise your loved one. Inflate the balloons with helium, tie ribbons to them, and attach the ribbons to the bottom of the box with tape.


4. Refrigerator made of balloons (photo)
Freeze the balloons with a little water to keep party drinks cool all the time.

5. How to make a drum out of a ball
You can use other containers, but not those with a wide neck. You will also need a pack of rubber bands to secure the balloon to the jar.

6. How to make a holiday decoration using balloons and photos

Inflate the balloons with helium, tie a ribbon to them, and attach photographs to the ribbon with tape. You can also glue photographs to sheets of white cardboard with double-sided tape, make holes in each sheet using a hole punch and tie the tape.
7. DIY balloon idea

Fill the balloon with confetti.
Use a white or clear balloon so the confetti can be seen. To make confetti, you can use any colored paper (plain, corrugated, glossy) and scissors for cutting small parts. You can also buy confetti at office supply stores and online.
8. DIY balloon gift
In addition to confetti, you can put money in the balloon and give it to the birthday person.

9. DIY glowing balloon crafts

You can also put LED light bulbs into the ball. Such light bulbs can be found in small keychains, and they come immediately with a battery.
You can do it yourself:
* Take out the core (the light bulb itself) from the LED light bulb, find a small round battery and place the contacts of the light bulb against the battery (1 on each side). Secure with electrical tape.


10. DIY fruit garland from balloons

You will need:
Small balls of different shapes and colors
Colored paper
Scissors
Strong thread.

* Inflate the balloon.
* Cut out leaves from paper.
* Attach the leaves to the balls and the balls to the thread with tape.
11. DIY master class made from balloons: a jumper for children.

You will need:
Small round balls
Scissors.
* Pour some water into one balloon and tie its tail. Cut off the edge of the ponytail with scissors.
* Take another ball and cut off the tail.


*Place the water balloon inside the second balloon.
* Take another ball and also cut off the tail and insert the workpiece into it.

* Continue adding more beads until the craft is strong enough.
12. Water balloons.

For the holiday, you can fill several balloons with water and hang them in the yard on a rope.
These balls can be used for various competitions. For example, try to burst water balloons in an unusual way.
13. Balloon tutorial: Decorate simple jars with balloons.

You will need:
Multi-colored balls
Jars
Scissors.


14. Balls of thread.

Using ordinary balls, jute thread and PVA glue, you can make these beautiful New Year decorations. You can add New Year's lights to them.


15. Balloon master class: lollipops.

* Inflate the balloon.
* Wrap the balloon in cellophane.
* Attach the ball to a long stick (plywood) with tape. The stick can be painted white.

16. Balloon Crafts: Ice Lamp.

You will need:
Screwdriver or knife
Freezer
Small candle or LED light bulbs
Thread or elastic band (to tie the tail of the ball).

* Fill the balloon with water and then tie its tail. You can add dye to the water to color the future lamp in the desired color.

* Place a balloon of water in a small bowl and place everything in the freezer for 12 hours.
* When the water in the ball freezes, the ball can be removed with any sharp object.

* Use a screwdriver or knife to make a hole in the ice ball. It is possible that there will be unfrozen water inside - it must be carefully poured out.

If there is no water, then by making a small hole, you can insert a plastic tube or small cylinder into it and pour hot water into it to expand the hole in the ice ball.
* Now you can put the ball on a candle or LED light bulb and thus decorate your yard or cottage in winter.


2. Photo with description of MK
.jpg)
3.Figures made from sausage balls (clickable pictures from MK)
4. Decorate the interior with balloons for the holiday
Balloon flowers
To create this balloon compositions you will need:
- Modeling balloons (SDM) in four colors (yellow, orange, red, ocher), 5-6 pieces of each color
- round orange balloons size 5" - 2 pieces
- round orange balloons size 11" - 2 pieces
- round yellow balloon size 11" - 1 piece
- round red balloon size 11" - 1 piece
- round ocher balloon size 11" - 1 piece
- helium for 4 balloons size 11"
- white ribbon for balloons 4.8 meters long
- compressor (or pump) for inflating balloons
- time 10-30 minutes
1. Inflate one balloon five centimeters and tie a knot tightly
.jpg)
2. Press the balloon knot into the inflated part of the modeling ball and hold it inside the inflated part with one hand. With your other hand, rotate the air portion of the balloon several times (5-7 full circles) around the knot and uninflated tip of the balloon until the balloon resembles a tulip bud and stem.
.jpg)
3. Create 20 tulips from all the prepared modeling balloons.
.jpg)
4. Cut half of one modeling ball and firmly tie all the resulting tulip stems with it.
.jpg)
5. Take two 5" orange round balloons and fill them with water (about 50 ml per balloon). Tie the knots of the balloons tightly.
.jpg)
6. Place orange balloons filled with water into a large orange 11-inch bowl.
.jpg)
7. Inflate this balloon with air to a seven-inch balloon size. Tie a knot tightly at the very end of the ball.
.jpg)
8. Tie an 11-inch orange ball to a bunch of tulip stems.
.jpg)
9. Move the air in the orange round ball to the far side of the ball.
.jpg)
10 Using one hand, press the bunch of tulip stems inside the orange round ball to the opposite side of the ball and grab the bunch from the outside of the ball.
.jpg)
11 Use the remaining piece of the orange modeling ball to tie a bunch of tulip stem ends around the outside of the orange round ball. In this case, use all your strength and possibly the help of an assistant. We have a pot for tulips.
.jpg)
12 Distribute the tulips nicely and evenly in the neck of the pot.
Fill the four remaining round balloons with helium to the full volume of the balloons. Tie a white ribbon 1.2 meters long to each ball.
Tie ribbons of helium balloons to the stems and buds of the tulips so that their heads point up.
balloon craft “Dog”
HOW TO DO
You will need:
- long modeling ball
- pear
Preparing raw materials
Let's first make the simplest figure - a dog. For this we need one ball. It should not be inflated with your mouth, but with the help of a special bulb. If you don’t have one, you can use a tonometer bulb or even a regular enema. Before inflating, grab the ends of the balloon and stretch it a little. Do not inflate completely, leave a tail about 10 centimeters long. Tie the balloon well and begin modeling.
Making a dog's nose
We begin to twist from the knot to the tail. First, we form the nose of the dog, twisting the bubble at a distance of 5 cm from the knot by 2-3 turns.
Making dog ears
Holding the bubble, we make another one. Bend the ball and squeeze it at the same distance as the second bubble. Twist three turns. We got dog ears.
Making the neck and paws
Now we make a bubble for the neck, 7 centimeters long. Bubbles 5 and 6 are the dog's front legs. We make them 6 cm long. We connect the sixth bubble with a “lock” to the neck.
Making the body, hind legs and tail
Next, we twist a bubble 8 cm long - the body of the dog. Just like the front legs, we do the hind legs. We still have a tail left. As a result of all these manipulations, we got such a cute dog. Now you know how to make crafts from balloons. Now you can surprise your loved ones and give your children many pleasant impressions.
READY!!!
DIY New Year's gift - a tiger made of balloons.
For the tiger you will need two balls. Before starting work, be sure to re-read the basic rules of twisting (twisting) - at the bottom of the page. Inflate the first balloon, leaving 15 cm uninflated, tie it in a knot, make a small bubble (1), then make a large bubble (2) for the nose, then another bubble (3) of the same size for the cheek, then twist a small bubble ( 4) for the ear, another large bubble (5) for the forehead, again a small bubble (6) for the second ear and a large bubble (7) for the second cheek. Make a lock twist between 2 and 3, 7 and 8 bubbles, that's the head.
Make a big bubble (8) - this will be the lower jaw. Take the first bubble, push it inside the head (holding the 2nd bubble on the outside of the head) and wrap it between the 8th and 9th bubble. The tiger has a nose and a mouth. Twist small bubbles (4 and 6) into an ear shape.
Inflate the second balloon all the way, then deflate a little (2 seconds) and tie it off. This is a ball for the body and legs of a tiger. Tie the ends of the ball with a knot and knead the resulting ring. Then make a twist opposite the knot, dividing the ball in half. Take both parts, squeeze them together at a distance equal to 13 lengths, and twist them - these will be the front paws.
Take the first ball, blow up a large bubble (9) - this is the neck. Connect both balls together between 9 and 10 bubbles and paws. Twist the hind legs in a similar way and connect them with the first ball - the tiger is ready!
TWISTING BASICS
1. How to inflate a sausage ball without it bursting when twisted? - Having inflated the balloon to the required length, release some air from it - this relieves excess pressure in the balloon and makes it easier to tie.
2. Where to start twisting the figure? - Always only from the neck of the ball, so that with each twist the air moves to the tail, where there is free space - then the ball will not burst.
3. The basic rule of twisting is to do all twists with one hand only in one direction (toward or away from you), all the time holding the first and penultimate bubbles with the other hand, using all the fingers of this hand - otherwise everything will unwind!
4. What terms are there in twisting?
- bubble - the inflated part of the ball between two twists.
- joint - place of twisting.
- twisting - turning and twisting the ball, resulting in a bubble and a joint.
- ottoman - a special bubble in the tail of an inflated balloon.
5. The main secret is 7 main types of twists!!!
- Simple twisting - squeeze the ball at the required distance from the neck, hold it with one hand in the place of the future twist, and with the other hand turn the ball 2-3 times around its axis. Hold both sides of the twist, otherwise it will come apart!
- Twist with a lock - make three bubbles in a row, stack the middle ones with each other, bending the ball at their junction, carefully pull them up and twist them together around the joints at least three times - this will prevent them from unwinding!
- Twist in the shape of an ear - make three bubbles, the middle one is less than 2.5 cm, holding the outermost bubbles together, carefully pull the middle one and twist it three times - you get an ear!
- Twist with a bend - make three bubbles, the middle one is large, holding the outer bubbles together, pull the big one and fold it in half, then twist it three times.
- Twist in the form of a tulip - with the tip of the index finger of your left hand, push the neck knot inside the ball to the second phalanx of the finger, with the other hand grab the knot through the ball and carefully, using the thumb and middle fingers of your left hand, pull the finger out of the ball, then twist it so that the knot is lower her - the tulip bud is ready!
- Twisting with a clapper - make a medium-sized bubble, then a series of five smaller bubbles, twist the first and last small bubbles together to make a ring. Twist the second and fourth bubbles in the shape of an ear, thanks to this the middle (popper) bubble is blocked. Poke it with a pin - pop! Bubbles 1, 2, 4, 5 have broken!
- Ottoman - pull the tail of the ball several times, squeeze the air from the inflated part into the tail, moving your hands along the ball - the ottoman is ready!
6. Bubbles sizes: small - 2.5 cm, medium - 3.75-5 cm, large - 5-7.5 cm.
7. Who is considered a real ball blower? - the one who knows how to twist 33 bubbles in one sausage - practice, and you will succeed!
If this is your first time encountering twisting - the art of creating various figures or toys based on balloons, the first thing you come to do is a dog. This “model” is the simplest and most popular in twisting. Step-by-step instructions with photographs and examples will help everyone make shapes from balloons with their own hands. In the article you will find examples, tips and secrets of doing the job.
Before you start creating an air toy, we recommend that you familiarize yourself with practical tips. If you decide to make figures from long balls, then the recommendations will be relevant for you, especially if this is your first time doing such a procedure. How to make a dog out of a balloon yourself:
- To ensure that balloon toys are always made, the base must first be inflated. Keep in mind that you will waste more time and effort if you inflate and twist the material at the same time. Moreover, using this technology it will not be possible to make a beautiful dog.
- Any balloon crafts, including dogs, should be twisted in only one direction. That is, either only from yourself, or only to yourself, otherwise it’s easy to get confused and then you will need to repeat all the actions again.
- You must take into account your strength when tying knots - you cannot tighten them too much, since the figure can burst at any stage, even at the final stage.
- Your actions must be confident. At the initial stage, before making crafts from sausage balls, the base must be visually divided into symmetrical parts, otherwise some parts may turn out to be different sizes.
- The material itself must be durable, preferably not made in China, since weak products are based on fragile artificial latex.
Step-by-step instructions for making balloon dogs
You can learn more about how to make a dog out of a ball in the master classes presented. To do this, you will need the material itself and a pump for making the dog, a little strength and patience. No threads are needed for this procedure. You should use a ShDM - a special ball for modeling. As stated above, cheap Chinese latex balloons are not suitable for this. How to make a dog out of a ball - read below.
From a sausage ball
First, you need to inflate the workpiece so that only part of the tail remains deflated (5 cm is enough). A fully inflated balloon will simply explode later, so in any case, leave some free space. Please note: if it is full and the future toy has become very tight, then you need to bleed off some air. Pinch the area to which you want to deflate. Do this carefully as the toy may come down completely. Once the required amount of air has been released, the warp should be tied. Let's get to the figure:
- The procedure for twisting the toy begins with the dog's head. This part takes up an average of 5 cm. Visually measure about 5 cm and twist this section. Beginners can easily figure out how to tie a balloon. 3-4 turns will be enough.
- The first ear of our toy will have the same dimensions. Twist this part in the same way. The dog's face and ear must be folded along the rest of the ball.

- Then you should measure the second ear, which should be identical in size to the first. Twist them together two turns.
- Let's make the neck. It is performed as shown in the photo, and its size should be from 6 cm to no more than 8 cm.

- After this, we move on to the front legs, the size of which should not exceed 7 cm. Tie the parts a few turns, fold them together and turn the lock two turns.
- Next, we move directly to the body. The dog's body should be no more than 10 cm in length. The torso is twisted in the same way.

- Following the example of the front paws, we also do the hind paws. The dimensions of the hind legs are the same - no more than 7 cm. The twisted bubbles should be placed one on top of the other, and then tighten the lock a few turns.
- What's left is the tail. The final stage is the design of the resulting toy. Using a marker, draw the dog's face, add a nose, mustache, and eyes. You have just learned how to make a dog out of a balloon yourself.

Diagram with dimensions and description of creating a poodle
- The base should be inflated, leaving about 12 cm for the tail.
- Then you need to blow five bubbles in a row and twist them, supporting them with your hand. A bubble of about 5 cm in size will be for the muzzle, the same amount for the back of the head, no more than 10 cm for one ear, 5 cm for the bangs and no more than 10 cm for the other ear.

- The back of the head and the bangs need to be aligned, as shown in the photo, and twisted with a lock.
- The poodle's face should be inserted into the hole formed between these bubbles. This way the head of the future toy will be almost ready.

- Next, you need to make several bubbles again: 5 cm for the neck, 8 cm for one paw, about 3 cm for the tip of the paw, the same amount for the tip of the other paw and 8 cm for the second paw.
- The paws must be placed opposite each other, aligning them.

- After this, the neck and paws should be twisted with a lock - the front part of the toy will be ready.
- Next, we perform the back part, for this we make several bubbles. For the body 5 cm, for the hind legs and their ends the same dimensions as for the front ones. The hind legs are combined in a similar way. All that remains of the material will be the tail. Actually, this completes the procedure for creating a poodle. Take a marker and design the resulting toy. The dog ball is ready.

Video tutorials: how to make a dog out of balloons
The instructions will help you make such a simple and cheap, but original craft. If, after the above master classes, you have any questions about the instructions, then we invite you to watch the video, which clearly describes step by step how to make crafts from sausage balls. This information will help you understand the basics of twisting, and over time, make more serious crafts.
Step-by-step master class for beginners
How to do it yourself
How to roll a long ball
Balloons can always add variety to a family holiday, and if these balloons are also folded into an animal, then the children will be crazy about your talent. Of course, to create aerial crafts, you will need balloons of a certain shape and material, but finding them will not be difficult in ordinary stationery or children's stores. If you like this activity and decide to fold balls for yourself, then this type of hobby has a name - twisting. Adults all over the world create real works of art from thousands and hundreds of balls. The only limit will be your imagination. Take the first steps towards your own twist creations in this article.
How to make figures from balls - what balls are needed
In total, three types of balls are produced in wide production, differing in their material:
- Latex balloons can be found in absolutely any store. These are the same balls that you have been purchasing in large quantities since childhood.
- Foil-coated ones are characterized by increased strength. Huge heavy balloons are made from this material; they perfectly retain all the properties of helium for almost a month. This is an expensive product that you can use once you gain experience.
- Plastic balls are hypoallergenic; finding them is not as difficult as foil ones, but it’s worth trying.
For your first balloon rolling experiments, take regular latex balloons. Of course, you want a long, thin stem shape. Round balls can also be made into various shapes, however, children love to watch the metamorphoses of such elongated balls. The color and length are at your discretion, if you are making a flower, do not forget to buy a green ball, if a giraffe or dog - yellow or orange.
How to make figures from balloons - flower
The very first task for beginners is to create a simple flower. You will have to make two whole models and then connect them. What you will need:
- Threads of the same color. They will not be visible in the craft.
- Two green balls for the stem.
- Two balls of any other color for the flower itself, or one very long one.
- A small pump, since the oblong-shaped balloons are difficult to inflate.
If you wish, you can attach decorations to the craft to your liking, or paint it with markers.
How to make petals
Do not inflate the balloon all the way. You always need to leave a little space for air, otherwise the balloon will burst, leave about seven centimeters uninflated.
- If you have one very long ball, then bend it in half, if you have two, then tie them together with thread. It will look like a folded ball.
- Fold it in half again, and twist the fold 360 degrees so that it does not unbend.
- Twist the ball again in the middle. You will now have something similar to the finished work.
- Bend two stems up and two down too. Grasp the bases with your fingers and connect them with thread.
- Now tie the base of the petals tightly, but hiding all the ends of the thread. You will get flower stems.


How to make a stem
After making the petals, this task will seem very easy to you. As you can already understand, the entire construction of the ball consists of kinks: you constantly twist the ball.
- To make the stem, take two green balls. Just twist one ball almost in the middle. This is where it will grow leaves.
- Twist the second ball four times along its entire length in equal proportions. Connect the first quarter to the second, and the third to the fourth.
- Tie two balls together. You have a stem with leaves.


- All you have to do is connect the stem to the flower itself. In addition, you can make a flower from ordinary round balls by simply connecting 5-6 balls and placing one central one between them. Such combinations will look beautiful if you choose the right color and add decor.


Having learned the principle of operation, you can easily come up with your own figures, the main thing is to stick to the technique:
- Twisting always occurs in one direction throughout the entire ball. Decide right away: you do them to the right or to the left.
- Do not forget to leave an impressive reserve in the balloon without air.
- Choose colors that match each other.
- To diversify the craft, draw in all the missing elements with a marker.
Now you can easily make any shape out of balls.