Such a suit can be made in just a couple of hours. Even someone who has never sewed and is not actually going to sew in the future will cope with this =)
The main details of such a suit are:
- cape (mantle)
- takes
For them we need:
- fabric (preferably velvet). I found my fabric in an old chest. It used to be a bedspread.
- fur (artificial or real) or something imitating / replacing fur
- elastic band (ordinary, which we insert into panties)
- satin ribbon
- lace cut
- button (or button)
- beads and bugles for decoration
BERET
Takes is circle.
Cut out an ordinary circle from the fabric. The diameter depends on the size of the child's head. The larger the head, the larger the diameter of the circle should be.
In my case, the diameter was 45 cm (including a 2 cm hem allowance).
But since we are dealing not just with mathematics, but with sewing, then to the obtained result D we need to add a hem allowance of 1.5-2 cm.
We need this allowance to insert the elastic.
I, however, did not resort to the formula. I cut out everything by eye =)
For a beret, it is better to take a dense fabric, because it keeps its shape better.
So, a circle was cut out of the fabric (by eye or by the formula).
Then we turn the edge of the circle on the wrong side so that later you can insert an elastic band (about 1.5-2 cm) and hem.
Cut off a piece of elastic, taking into account the size of the head and using a safety pin, insert it into our circle. Like panties.
The beret is ready! Now let's decorate it.
Anything is suitable for decoration. I chose fur. Just a small piece was available.
In addition, fur always looks impressive.
We just sew our fur or something that imitates fur, or some other decoration to the beret.
CLOTH (MANTLE)
And again we will draw a circle, or rather a semicircle.
Cut out on fabric semicircle using the following indicators:
AA1 = length of the cape (mantle). Any length is chosen that we want.
AA2 = OSH / 3.14
where ОШ - neck circumference; and 3.14 - again the number "Pi".
In a word, the same formula came in handy as for the beret, only the designations for the diagram were different.

Now we sew the bottom and sides of the cape.
You can use a bias tape for this. Or sew on tape around the edges.
We turn off the neck with a wide satin ribbon.
We choose the length of the ribbon so that the edges of the ribbon can be used as a tie, so that the cape does not fall off the shoulders.
If desired, the cape (mantle) can be decorated, for example, with beads.
I decided to embroider a small crown on the cape with beads.

COLLAR
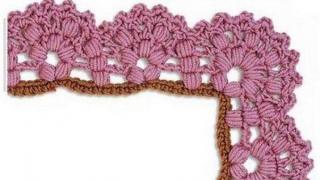
Take a wide piece of lace.
On one side, we put the lace on the thread and tighten it slightly so that the assembly is obtained and so that it fits the size of the child's neck, but kept loosely around the neck.
We sew a bias tape to this place, thereby securing our assembly.
Sew on a button (to fasten). Top can be decorated with bugles or decorative buttons.
You can, of course, make a button as a fastener.
I gave up the button because I didn't want to mess with the buttonhole.


That's all!
We put on a costume for the child and admire him =)
Such a suit can be complemented sword.
Toy swords are sold in stores. Dad made our sword from wood.
Simple, isn't it? And what an effect!
In addition, this costume gives room for imagination.
We sew stars on the mantle, replace the beret with a cone-shaped cap - and we get a wizard.
We replace the beret with a crown, and we make the mantle from light airy fabric - and we get a fairy costume for a girl.
In general, there is something to do on New Year's Eve =)
If you have any questions or ideas, then write directly in the comments.
Always yours,
(c) Katerina Shlykova
Quoting and partial copying articles and stories, possibly indicating the source in the form active link to the corresponding page of the site.
You may also be interested in:
Such a suit can be made in just a couple of hours. Even someone who has never sewed and is not actually going to sew in the future will cope with this =)
The main details of such a suit are:
- cape (mantle)
- takes
For them we need:
- fabric (preferably velvet). I found my fabric in an old chest. It used to be a bedspread.
- fur (artificial or real) or something imitating / replacing fur
- elastic band (ordinary, which we insert into panties)
- satin ribbon
- lace cut
- button (or button)
- beads and bugles for decoration
BERET
Takes is circle.
Cut out an ordinary circle from the fabric. The diameter depends on the size of the child's head. The larger the head, the larger the diameter of the circle should be.
In my case, the diameter was 45 cm (including a 2 cm hem allowance).
But since we are dealing not just with mathematics, but with sewing, then to the obtained result D we need to add a hem allowance of 1.5-2 cm.
We need this allowance to insert the elastic.
I, however, did not resort to the formula. I cut out everything by eye =)
For a beret, it is better to take a dense fabric, because it keeps its shape better.
So, a circle was cut out of the fabric (by eye or by the formula).
Then we turn the edge of the circle on the wrong side so that later you can insert an elastic band (about 1.5-2 cm) and hem.
Cut off a piece of elastic, taking into account the size of the head and using a safety pin, insert it into our circle. Like panties.
The beret is ready! Now let's decorate it.
Anything is suitable for decoration. I chose fur. Just a small piece was available.
In addition, fur always looks impressive.
We just sew our fur or something that imitates fur, or some other decoration to the beret.
CLOTH (MANTLE)
And again we will draw a circle, or rather a semicircle.
Cut out on fabric semicircle using the following indicators:
AA1 = length of the cape (mantle). Any length is chosen that we want.
AA2 = OSH / 3.14
where ОШ - neck circumference; and 3.14 - again the number "Pi".
In a word, the same formula came in handy as for the beret, only the designations for the diagram were different.
Now we sew the bottom and sides of the cape.
You can use a bias tape for this. Or sew on tape around the edges.
We turn off the neck with a wide satin ribbon.
We choose the length of the ribbon so that the edges of the ribbon can be used as a tie, so that the cape does not fall off the shoulders.
If desired, the cape (mantle) can be decorated, for example, with beads.
I decided to embroider a small crown on the cape with beads.
COLLAR
Take a wide piece of lace.
On one side, we put the lace on the thread and tighten it slightly so that the assembly is obtained and so that it fits the size of the child's neck, but kept loosely around the neck.
We sew a bias tape to this place, thereby securing our assembly.
Sew on a button (to fasten). Top can be decorated with bugles or decorative buttons.
You can, of course, make a button as a fastener.
I gave up the button because I didn't want to mess with the buttonhole.
That's all!
We put on a costume for the child and admire him =)
Such a suit can be complemented sword.
Toy swords are sold in stores. Dad made our sword from wood.
Simple, isn't it? And what an effect!
In addition, this costume gives room for imagination.
We sew stars on the mantle, replace the beret with a cone-shaped cap - and we get a wizard.
We replace the beret with a crown, and we make the mantle from light airy fabric - and we get a fairy costume for a girl.
In general, there is something to do on New Year's Eve =)
If you have any questions or ideas, then write directly in the comments.
Always yours,
(c) Katerina Shlykova
Quoting and partial copying articles and stories, possibly indicating the source in the form active link to the corresponding page of the site.
You may also be interested in:
Preparing for the New Year is not only shopping trips in search of a gift for your baby. To create a festive mood, you need a carnival costume. This simple master class will show you how to quickly make a beautiful prince costume for a boy from scrap materials with your own hands.
Details of the costume "Prince"
A prince costume is perfect for performing in the garden or school. This romantic look will suit boys of any age.
The prince's costume can be in several variations. It is similar to the costume of a musketeer, king, page or puss in boots. So some of the details can be used for other performances and roles.
The "Prince" costume for a boy consists of short pants, a white loose shirt, a vest, a golf, a robe and a crown / beret. In addition to the prince's costume for a boy, you can make a beautiful sword with your own hands.
The fabric for the suit is selected bright. A suit made of velvet or satin fabric looks beautiful. Pants and robes can be made from blue, green or gold fabric. The red fabric is more suitable for the king's costume, so it is better not to use it.
Do-it-yourself sewing of a "Prince" suit for a boy
Sewing a suit begins with sewing a shirt, vest and short trousers.
Step # 1 Sewing a vest for the prince
Where can I get a pattern? We take any child's T-shirt of a suitable size and outline it on paper. We transfer the paper parts to a bright fabric and cut them out with allowances for the seams.
We sew a vest for the prince along the side and shoulder seams. We process the bottom, armholes and neckline. We turn the part out onto the front side. The vest is ready.
To make it faster and easier to sew a suit, we take any white shirt. It can be short or long sleeved, but loose.
We begin to decorate the shirt with white lace. We will sew it at the bottom of the sleeves. We cut off the necessary amount of dense lace and attach it on a typewriter.
Step number 3 We sew the prince's pants
For sewing pants, you can circle any comfortable pants for your child or take this pattern. You can shrink or enlarge it to get the size you want.
We lay out the paper parts on a satin fabric and cut them out with seam allowances. Fold the pants with the right side inward and sew along the side and crotch seams. Turn the top of the trousers by 2 cm and sew. We measure the circumference of the child's abdomen, cut off the required amount of elastic. We insert it into the upper edge of the panties. The finished trousers will not fall off during the performance.
The bottom of the trousers can be decorated with lace or simply sewn in an elastic band, stepping back 5-7 cm from the edge. Then the trousers will look voluminous and graceful.
How to make a robe for a prince
A cape on the shoulders can be made of velvet fabric to match the suit. Then the finished suit will look noble and romantic.
For the mantle you will need:
A piece of fabric 1x2 meters;
Sewing tools.
Progress
1. First, draw a semicircle on paper. To make it even, we tie the marker with a rope, the length of which is equal to the width of the fabric. We set it in the middle of the cut. Like this.
2. Cut out the workpiece, transfer it to the fabric and cut it out. In addition, we cut out two strips of fabric 5 cm wide.
3.On one side of the strip, we make a piping, iron it and shade it off.
4. We pin the strip to the neck of the mantle, put a seam on a typewriter.
We decorate the finished mantle with the royal sign. It can be embroidered on a raincoat or sewn on ready-made.
What to make a crown of a prince
We will make a crown for a prince's costume for a boy with our own hands from the remnants of lace and jewelry.
Materials:
Thick wide lace;
Beads and various jewelry;
Silver or gold acrylic paint;
Gelatin;
Hard cardboard.
Progress
1. Cut off the lace you need and sew the ends to make a ring.
2. The crown must be given the necessary rigidity. For this we will use gelatin. 1.5 tsp Dilute gelatin with warm water and leave to swell for 40 minutes. Place the crown in the solution for 30 minutes.
3. Now from hard cardboard we make a blank of the required size to pull the lace. Cut off a strip of the required size and glue the ends.
4. Stretch the lace and dry it in the microwave for 30 seconds, periodically immersing it again in gelatin. We do this until the crown becomes rigid.
5. Remove the dried product from the blank.
6. We will decorate the root with silver or gold paint. We apply it with a brush on the dried lace, dry it on the windowsill.
Decorate the finished crown with light beads, rhinestones or jewelry. All small parts are carefully glued with a glue gun.
Beret for a prince with feathers
When sewing a prince's costume for a boy with your own hands, a headdress can be made in the form of a luxurious beret with feathers. Some boys will like this idea more than a crown. It is quite simple to make it.
Materials:
Fabric to match the suit and mantle;
Feathers for decoration;
Progress
For sewing a beret, you can use the given pattern.
1. Cut the paper parts of the pattern and transfer to the fabric.
2. Chip off the details of the crown and bottom, sew on a typewriter.
3. Gather up the workpiece, evenly distributing it over the beret edging.
4. Make a line on a typewriter.
Turn the finished beret on the front side and decorate with feathers, lace or rhinestones. They are neatly glued to the side of the beret, covering this place with a large brooch.
The beret can be used not only for the prince's costume. He is irreplaceable in the image of a puss in boots, a marquis, a musketeer and other fairy-tale heroes.
You need to complement the image of the prince with white socks, shoes and a sword.
Do-it-yourself sword for the prince
For a prince, a sword is an irreplaceable attribute of a suit. It can be made from glazing beads or wooden laths. And for young children, you can make a sword out of cardboard.
Materials:
Wooden lath;
Plastic cover;
For a sword, you need a piece of wood at least 1 meter. It needs to be well cleaned with sandpaper and painted with silver paint.
After the paint dries up, we proceed to decorate the sword. First, we make a handle. We make a hole in the plastic cover and put it on the sword. We paint with paint and let dry. We tie the finished sword at the handle with a bright rain or tinsel.
For young children, we make a sword from cardboard. Draw two blanks of the future sword and handle on thick cardboard. Carefully cut them out and glue them together. Such a sword will not break during the performance.
We paint the finished and dry part with paints, tie a bright rain. The cardboard sword is ready!
So, from the materials at hand, you can sew a prince's costume for a boy with your own hands in a few evenings, without having special skills. All you need is a step-by-step master class, desire and a little imagination.
Also find out ...
- For a child to grow strong and agile, he needs this
- How to look 10 years younger than your age
- How to get rid of expression lines
- How to permanently remove cellulite
- How to lose weight quickly without dieting and fitness
Before the upcoming holidays, many parents prefer to buy ready-made carnival costumes for their children. But since the outfits presented in stores cost a lot of money, the question arises: isn't it easier to make a suit with your own hands? Today we will tell you how to make an original tsar costume for a boy at home.
The main details of the image in the outfit of the king
If you remember Russian fairy tales where such a character is found, then you can try to recreate a similar image yourself. But first, let's remember what characteristic details are present in the tsar's costume:
- mantle;
- Crown;
- cropped pantaloons;
- scepter;
- shoes with buckles.
Based on this, you can start making a costume for the royal person.
How to sew the mantle of the king
In fact, despite the seeming complexity of the image, everything is quite simple. In order to make the king's mantle yourself, you need to stock up on red or burgundy satin and faux white fur for decoration. Then follow the instructions:
1. Draw a large circle on the fabric with special chalk or soap. Its diameter depends on the height of the child and how long you are going to make the cape.
2. For the neck in the middle of the large circle, draw a smaller circle. Calculate the size in advance for ease of wear.
3. Cut out a large circle first, then a small one. And sew the edges with a sewing machine.
4. Sew the white fur to the hem of the robe. Cut the collar out of the fur and frame the collar with it. A large golden button can be sewn on at the collar joint.

5. You can also paint the royal insignia on the back with fabric paint and paper cut stencils. Just attach the stencil and brush the paint in 2 layers alternately. The mantle for the New Year's costume is ready!
The second version of the mantle
You can go an even simpler way and sew a rectangular cape. To do this, cut a rectangle out of the fabric. Choose the length based on the height of your child, and the width based on its size. After cutting out a large rectangle, wrap the child with it in order to understand exactly whether a given size is suitable or not. If it fits, sew an eyelet to one of the corners. And to the other - a large metal button. Decorate the edges of the cape with faux fur. Along its entire length, it can be decorated with an ornament of sequins, beads or other decorative elements. Another decoration idea is braid. Sew brightly painted tape down the center of your robe or wherever you want.
Making the royal crown
In addition to the mantle, the king's costume has another equally important accessory - the crown. Without her, the image will be unrecognizable.

There are many ways to make a crown with your own hands. Of course, you can buy a ready-made one, but you can also whip up it out of cardboard. But we offer you another option. For it you will need:
- plastic bottle (5 liters);
- baking foil;
- scissors.
1. Cut off the top of the bottle. Select the cut point where the taper begins towards the neck. That is, approximately in half.
2. Since the bottle is usually wedge-shaped, choose a flat piece and cut off the bottom and a little of the top. Then cut the cloves along the top.
3. Measure a piece from the foil, the length of which will be equal to the circumference of the cut bottle. It is better to cut off a few centimeters more, just in case.
4. Carefully, trying not to spoil the thin foil, start wrapping the bottle blank. The teeth of the crown should, as it were, hide under the foil, we will arrange them later.
5. Using your hand to feel for each tooth, make cuts on both sides of each tooth.
6. Fold the edges of the foil to form each of the teeth. They should be neat.
7.Use glue to decorate the crown with rhinestones or artificial stones. You can use bright confetti, they stick well and are inexpensive.

Royal pantaloons
Funny pants for the children's costume of the king can be sewn according to the instructions in the video. It is advisable to choose the fabric from which the mantle was sewn.

King's Scepter
An important attribute of the king's costume for a boy is a scepter decorated with stones and gold. For this you will need a small stick, foil, and lots of jewelry.
First you need to make a small ball of paper. After rolling the paper into a ball, wrap it in foil. Then do the same with the stick. Then fix the ball to one end of the stick and carefully wrap them together with a few more layers of foil. Roll up until you are sure of the strength of the structure. Then it's up to little - decoration. Using a glue gun, glue a lot of decorative rhinestones to the scepter and top. Lay out the beaded and sequin pattern. In the middle of the ball, you can glue a small cross cut from silver or gold cardboard.

Buckle shoes
When making a New Year's costume for the king, do not forget about each of the elements. This rule also applies to shoes. Since buying special shoes for the carnival is quite expensive, we suggest decorating the ones you already have with your own hands.
To do this, you need black ballet flats or soft slippers, satin ribbons, cardboard, glue.
1. Cut two square "donuts" with slightly rounded edges out of gold cardboard.
2. Cut about 12 cm from the red satin ribbon, fold in half and sew along the edge. Then pass it through the cardboard buckle. It should look like a bow.
3. Decorate the buckle with rhinestones or beads by gluing them to both blanks.
4.Use glue to fix the buckles to the shoes.
5. As a decoration, you can use a thin tape, which is sewn to the shoe in the heel area. DIY shoes for the king's costume are ready! At a minimum cost, you will receive another striking accessory that can later be used for other performances.
The previous time we analyzed. In this part we will look at how to sew a jacket.
We will use it for the boy: we leave the back and shelves as in the main pattern, and we should change the sleeve.
Of course, soon the Christmas trees are festive, and every caring mommy is already thinking about where to find sewing New Year's costumes, which would be of high quality and inexpensive. But of course, if you want to do well, you need to sew it yourself.
note that our sleeve is divided into two parts: "Flashlight" at the top and straight to the bottom.
1) Take the main sleeve pattern.
2) We outline it on new paper. 
3) Specify the desired length and width of the sleeve at the wrist.
4) Now you need to determine the height of the "flashlight" and divide the sleeve into two parts: for this, from the place on the shoulder where the sleeve begins, measure the desired length, measure it on the pattern from the top along the center line and draw a horizontal line through this point.
5) We cut the pattern along the resulting line.

6) Set aside the lower part for now.
7) Divide the upper part of the pattern into equal parts starting from the center to the right and to the left (for convenience, number the resulting sectors).

8) Cut the pattern along the resulting lines.

9) Now is the most crucial moment. Smooth the resulting details onto the fabric: starting from the center
- the distance between parts 6 and 7 from above should be 5 cm, from below - 2 cm;
- The distance between all other parts is 2 cm at the top, 1 cm at the bottom.

10) We outline the resulting part.

11) Add 2-5 cm along the edge of the sleeve. Make marks and connect them with a smooth line.


12) Along the entire perimeter, add 1-2 cm for allowances.

13) We circle the bottom of the pattern (fabric in the main color), add 1-2 cm for the allowances.


14) Cut out the resulting parts.

15) We connect the two halves of the sleeve to get a one-piece piece. To do this, it is necessary to assemble the upper part in such a way that the width of the parts at the junction is the same. Gathered, swept, stitched, removed the basting, ironed the seam.)


16) We process the sleeve.
We need to make sure that the length of the ridge on the fabric matches the length of the original pattern. To do this, we evenly make the tucks (I advise you to start from the center and move in opposite directions). When you are sure that you have succeeded, sew an okat.


17) At this stage, you can connect the sleeve, or you can sheathe it with tape along the cuff and at the junction of the sleeve parts and leave, until the desired moment, in this form

Next, we need:
-Cut out the details of the backrest and shelves (do not forget to leave a 3 cm allowance for processing the shelves and bottom)
-connect them at the shoulder seams
- sew the sleeve along the edge, the connecting seam, trim the face with braid, sew the sleeve itself
-connect the side seams.
To make a collar:
1) We measure the neckline from the beginning of one shelf to the beginning of the second shelf (let's say you got 17 cm), this will be the length of the collar.
2) Choose the height yourself, for example 3 cm,
3) Based on the measurements, we need a rectangle 6 cm high and 17 cm long, we leave an allowance of 1 cm around the entire perimeter.
4) Cut out the part.
5) Fold the part with the right side inward and sew the sides
6) We turn out the part, smooth the seams.
7) We attach the part to the neck, face to face and sweep, attach, smooth
8) Now our collar is sewn only on the front side. Fold up the allowance and baste the collar from the wrong side, you don't have to attach it, since later in this place we will sew the braid and the wrong side is sewn accordingly.
To make a fringe on the neckline, cuffs and bottom of the jacket:
- we measure the length to form gathers, multiply it by 2-3, it all depends on the desired result, the larger the number, the more folds - we measure the height we need, multiply it by 2 and plus allowances
- cut out the resulting rectangle
- For the neckline and bottom, fold the fabric in half with the right side inward and sew the sides, turn it out, make gathers to the desired length
- For a cuff, first close the rectangle into a ring and only then fold the resulting part in half with the wrong side inward, make assemblies to the desired length.
We attach the resulting parts to the cuffs, neckline and bottom, respectively.


The jacket is ready, it remains to sheathe it with tape and sew on the buttons for the fastener.


I got such a jacket for the prince, which one you will have depends only on your imagination.

And it seemed such a difficult question, how to sew a New Year's one, had already been successfully resolved. Next time we will make for this costume too.