How to make a mask with your own hands?

No carnival is complete without a mask. A similar accessory is also welcome at various themed parties, celebrations on the occasion of the New Year, Halloween. Prepare a realistic silicone or polyurethane mask to impress your friends. Next, we'll show you how to do it.
Preparation for work
To make a DIY mask, you will need to find a store in your city that sells silicone for hand-made products or two-component liquid polyurethane. Alternatively, it can be an art shop with goods for creativity or an online store. These materials are not very cheap, but you will create a thing not for one time, but for repeated use. So why not afford to buy? Before ordering, be sure to explain to the seller what exactly you need the product for - he will help you choose exactly what you need. You will also need clay-based plasticine.
Take several sheets of plasticine and heat them for 15-20 minutes in the oven at a temperature of 65 to 90 degrees, but no more - the sheets should become very flexible and warm, but not hot. Don't let the clay melt.
Place the mannequin head on a plank or other surface and fix it with tape or other improvised means, otherwise it will be inconvenient to work.
base molding

Create a mask

Mask design

If the described technique seems complicated to you, then you can always turn to more simple ways making masks.
Everyone on this holiday tries to show with the help of a suit what he is capable of. But the image will not be complete without a mask. You can buy latex faces at your local prank store or make your own at home.
What will be needed?
To create a latex mask, you will need special materials that can be bought at a themed store or ordered online for delivery to your home or post office. Unfortunately, not in all cities it is easy to find some devices for working with such unusual material. So, to make masks, latex overlays and other attributes for the image, you will need:
- High quality liquid latex.
- Special forms for masks.
- head mannequin.
- Brushes of different sizes.
- Foam sponges.
- Clean gauze or bandage.
- Scissors.
- Acrylic paints.
- PVA glue.
And, of course, some skill will come in handy. The first time a realistic latex mask may not work, so we advise you to practice on small forms of animals or fruits.
Separately, I would like to focus on time costs. The fact is that latex dries for a rather long time, and it will have to be applied in several layers. Therefore, plan in advance to make a mask. Latex ones look much more realistic and are more comfortable to use than plastic ones. But making them is more difficult.

How to do?
- Prepare from plaster or polymer clay shape. If you have a ready-made mask mannequin, place it on a flat surface and secure it to avoid damage.
- Cut a bandage or gauze and glue it with PVA glue to the areas that need support. Usually this is the so-called T-zone of the face and the area of the cheekbones and cheeks. This is necessary so that the finished mask keeps its shape and does not spread.
- After the glue has dried, carefully apply the first layer of liquid latex to the mold using a sponge. Don't make it too thick. Firstly, this way it will freeze longer, and secondly, it can leak and ruin all the work.
- After the latex dries, gently apply a second layer with a brush and also wait until it has completely cured. In total, you need to create 10 such layers, alternately adding a bandage to the right places.
- When the mask is completely ready, generously sprinkle it with talcum powder or baby powder so that it does not stick together.
- Gently pry the finished product and remove it from the mold.
- Now you can start coloring the resulting mask. Latex work requires careful cleaning of the surface before applying paints.
- Add a small amount of acrylic paint to the mask and use the brushes to paint on the mask.
- Let the material dry well.
Your mask is ready. It remains only to try it on and come up with a mount, unless, of course, you made it solid.

The following simple tips will help you keep your appearance masks. Latex products are finicky in storage and handling.
- Don't feel sorry for the talc. It is needed so that the latex product does not stick to the form and work surfaces.
- To speed up the curing process, you can dry the layers with a hair dryer.
- If possible, instead of acrylic paints, get castor makeup.
- To make the mask last longer, store it stuffed with cloth or paper.
- Be sure to wash the product well with soap and dry before storing.
Mask Ideas
The most popular masks today are all kinds of monsters, vampires, superheroes and warriors. For example, the Joker is a favorite character of all comic book fans.
There are also women's latex masks. Girls can be transformed by a super girl or various fantasy characters. Let's say Catwoman never loses popularity. However, the choice depends on your taste and imagination!
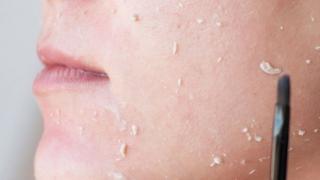
Recently, a letter came to my mail with a question: how to make a silicone cast of a face at home with your own hands. And in order not to put off the answer indefinitely, I decided to describe in detail the process of taking a cast from a person’s nature, and more specifically from a face. In a similar way, you can take a cast from any part of the human body: arms, legs, priests, chest, back, etc.
Of course you need to buy necessary materials for work:
- two-component silicone, which will be safe for human skin. For example, the silicone mass for Body Double "Standard Set" and Body Double "Fast Set" impressions is good in this capacity. These are quite durable platinum-based silicones that are applied to areas of the skin to create shapes from the face, hands, or other parts of the body. Molds made from these materials are designed for multiple pouring of gypsum, wax, fusible metals, polyurethane plastics, epoxy or polyester resins, etc. These silicones are not flowy, so they are easy to apply with a regular brush, and they dry very quickly. With the help of this silicone, you can make a cast of your face, and then cast a plaster or plastic cast on it.
- separating cream-lubricant for the face. It is necessary so that the finished rubber cast is easily separated from the skin.
- a bandage and a 2 kg pack of gypsum - to create a solid substrate for a silicone cast.
- brushes thick and thin.

To begin with, the face must be lubricated with a separating cream so that the silicone mass then easily separates from the skin of the face and accidentally caught hair does not remain in the mask either.

Then, two-component silicone is diluted according to the instructions, and applied to the skin with a brush. Surprisingly, when solidified, the silicone mass exactly repeats all the nuances of the face: the smallest pores, scars, hair growing on the face, etc. It is advisable to apply the silicone mass for taking impressions near the nostrils with a thin brush so that the holes of the nostrils are even.

When the silicone adheres, it is necessary to spread the bandage cut into pieces evenly over the entire mask and apply gypsum diluted to the density of sour cream. It is advisable to apply several layers of plaster so that the substrate under the cast is strong.

When the gypsum has completely hardened, and this will come in about 20 minutes, the substrate is carefully removed, and then the finished cast of the face is already removed.

Further, using the obtained silicone face and the manufactured gypsum substrate, the resulting face can be cast from gypsum, plastic, plastic and other materials. To do this, first the substrate is installed on the table, the finished silicone cast is placed in it, and gypsum, plastic, wax, etc. materials are poured into the resulting mold. And only then the resulting sample of the finished face can be painted with any acrylic paints.
Hi, zhezhisty and accomplices:)!
As a newcomer to the community, I bring to your judgment a post about how masks were made in the Just the Same project on Channel One. The essence of the show is to sing the song of a famous artist in the most similar voice and in the most similar way. And if the first depends entirely on the performing artist, then the second is the fruit of the work of dozens of people, including plastic make-up artists.

In general, I have the process of preparing images in my LiveJournal, but here I would like to delve into the technology for making a mask that corrects the shape of the face, on which then the usual makeup, wig and, finally, the costume are placed.
You will learn about how many tricks a silicone mask is poured, why it is necessary to wrap an artist in black polyethylene, what horror-horror-horror looks like, and who needs all this, you will find out
First of all, we get acquainted with the guys from the workshop, which is located at Mosfilm. It all looks like a museum of a crazy puppeteer, and the first exhibits meet us at the entrance.

In principle, the exhibits at the entrance can be viewed for a long time, but I will show a couple of photos, and we will move to the workshop, because they are already waiting for us there.


And they are waiting for us at the ready with black bags, plaster and silicone. Because the first thing to do is to take a cast from the face and make a mold for filling masks. Fourteen programs are filmed during the season, respectively, during this time, specialists need to make 14 masks. Fortunately, the cast is removed only once. The cast was filmed in February, and I did not know yet that Renas, the man who puts a rubber cap on me, will not only mold me into a Sting at the end of the season, but will also star in my summer video, the presentation of which will take place this Thursday;)

So the topic of black packages is revealed. And now a special VERY COLD compound based on silicone is poured onto the face so that the cast exactly repeats the shape of the face. The thing is so cold that you have to make an effort not to start chattering your teeth.

Gypsum is then applied to the mold so as not to damage the silicone layer. For half an hour, while this whole structure dries, you can neither move nor talk and "breathe also carefully," as the magicians of plastic makeup advised me. I tried to do everything very carefully, so as not to repeat the procedure a second time.

As a result, a special polymer is poured into the resulting workpiece, which, after hardening and extraction (and this happens a couple of days after the impression is taken), looks like this. Similar?

In the background, a working board with photographs of all the participants in the project and someone's mask left over from the filming of the last program.
Well, half the work is done, but the most interesting is yet to come. Here is another exhibit, this time a hobby of one of the studio employees on the left).

By the way, here is the same employee.
The most exciting process begins - the preparation of the mask. First of all, a plasticine mask is molded on the cast, "completing" the artist's face to the face of the person he will portray. Sting is being molded from me today, for example :)

And from Lena Maksimova - Mikhail "A Thousand Devils!" Boyarsky.

Sometimes the master gets carried away, it turns out such a thing, completely unlike Alexander Gradsky, for example:

The day is long, there is little strength, and therefore the guys periodically support each other with music :)

But without the help of advice is also not complete, of course. Especially when it comes to Sting. Responsibility w)

Sculpting a face is the most time-consuming process that takes the whole working day, or even more. When the shape of the face is ready, a relief is applied to the "skin" so that the face then looks more natural, and not like a plastic mask (as it actually is).

And a mustache, of course. No mustache.

When the plasticine runs out, it's time to fill the workpiece. But first, we line up the masks in a row and admire the result.

What we have achieved is called "positive".

This blank exactly repeats the shape of the face of the hero who will be portrayed in the show "Just Like It". But before the real mask is still like walking to the moon. We have to make a negative, and only then pour the composition there, which, having frozen, will become a mask superimposed on the face of the hero of the program. Let's continue.
The positive is coated with a layer of silicone, which will be the upper, soft, layer of the negative. Tadysh.

Another layer is applied on top, thicker.

And one more.

And more, and more. Until the workpiece becomes like this.

We apply a layer of lubricant to facilitate the subsequent removal of the workpiece from the mold, and you can proceed to the mold itself. The plastic paste that is the component of the outer part of the negative, although similar to ice cream, is not recommended for ingestion due to its tendency to harden and toxicity. Let's just say the nutritionist won't approve)

The mixture is two-component. Pour and mix.

And we mix.

Until we get a homogeneous, slightly foamy mass.

And while this is happening, we pay attention to the abundance of tools and words to denote it :)

We apply the plastic mass to the workpiece.


Thick, thick layer. Here, as you can see, the material is not spared :)

In this state, the blank will stand for at least 12 hours, so that the soft layers of silicone harden and are ready to form the mask. For some reason, the word "silence" is asked.

Even despite the fact that 14 masks need to be prepared for each program (and since two programs are filmed two days in a row, 28 masks need to be made in a week and a half, when the images are already approved), the guys still have some free time. And they know what to spend it on :)

In fact, if you see in Moscow on Halloween in a freaking type club with a face like that, then this is 85% the work of these guys. :)

Well, the time has come, and you need to separate the positive and the negative in order to make a mask with their help. An iron spacer is pre-inserted into the positive, with the help of which undocking can be carried out smoothly and without sudden actions (as well as with the help of knowledge of the lever rule, a simple device with a belt, and such and such a mother), so as not to tear the silicone.


Plasticine is no longer needed, so its remnants from both parts must be removed.

Now a layer of vinyl is applied to the positive. This film will keep the mask on the artist's face.

A lubricant is applied to the inside of the negative so that the mask does not stick to it (the negative) and can be easily removed.

Now begins, in fact, the manufacture of the mask. It is mixed on the basis of several components, but the basis, of course, is silicone (silicone is our everything!). It is very important to keep proportions.

Without dyes, the mask would be transparent, and it would have to be painted to match the skin color directly on the face, creating a layer of "plaster". In order not to complicate the work of make-up artists, the mask is painted in a near-body color at the manufacturing stage. A little creamy, a little red to taste and to the eye.


Now very important point, from the silicone mass, before it hardens, you need to remove air bubbles so that the mass is homogeneous. How to do it? Yes, very simple. Vacuum.

The solution is placed under a cap, from which air is pumped out by an electric pump.

Oleg is closely following the process. Not that something could go wrong here, he just likes to look at the bubbles :)

Never work with a vacuum without gloves. Do you hear? Never!

Finally, a liquid mask without bubbles (this is important) is poured into the negative.

The positive is inserted on top. Thus, the resulting mask will repeat the shape of my face from the inside, and the face of the artist I will play from the outside.

It remains to press it well and wait again until it hardens.

While we wait finished mask, let me introduce you to the director of the Illusion Industries Moscow studio, Irina. She is great:)

Finally, the mask is ready, and it needs to be carefully separated from the negative and the positive. Almost zen :)


The instructions provided by American technologists recommend keeping the mask in a positive position, but our guys improved the approach a bit so that the mask does not deform under its own weight.

The makeup process looks something like this, and this is just the beginning.

I have about such associations.

By the way, although this is no longer the subject of this post, the Sting as a result turned out like this:


I hope you enjoyed it :)
Post prepared specifically for the community
ORIGINAL INSTRUCTIONS:
So. To begin with, we need the face of the person on whom this mask will be made, the person is laid on the floor (or on the table). We put cloth, polyethylene or the like on his face. (don't forget to make holes for his nose so he doesn't choke). Now we take ordinary plasticine (or clay is better) and stick around the face so that we get a normal cast from his face. It will be necessary to act carefully in the area of \u200b\u200bthe eyes, nose and mouth, so as not to damage the person ...
Now we very carefully unstick the whole product from the person. We've got a form. You need to pour wax into this form, and not just pour it - but pour it entirely (as you pour tea into a mug to the brim). Then we wait a few hours until the wax hardens (you can postpone it for the next day). Carefully separate the hardened wax from the mold. That's all - we got a cast of our face, now we can form any mask (or several different ones).
To form the mask, you need to use building silicone. It is sold in the construction markets in spray cans. With the help of this composition, we coat the cast - to form the lower layer. (Silicone dries quickly - so we will work in layers) Next, we make all the protruding elements - such as the chin, eyebrows, nose - in general, we form a draft version of the future face. Next - the last layer - we form the surface of the face - for this we apply a thin layer of silicone and in some places we stick warts (a drop of silicone dropped onto a frozen surface), cuts (I think - here you can figure it out yourself, you can make a good lacerated wound with a nail ...), wrinkles, and etc.
After the face is finally formed, in some places we cut off unnecessary pieces with a knife, in some places you can decorate the “skin” by rubbing it (quite a bit) with sandpaper ... Now you need to paint the whole thing so that it is as realistic as possible - but it’s better to entrust this matter a person who knows how to use paints, because this process is very complicated and dreary. Drawing every wrinkle and wart is very difficult.
The main thing is not to forget to make a fabric lining for the mask and slits for the nose and mouth (oh, yes, also for the eyes). You can fasten the mask with an elastic band or with the help of theatrical means (such as glue, etc.)

MASK. "MY EDITION":
a cast of the face was made of clay... There is a difficulty here! If the clay is strongly saturated with moisture, then it easily wrinkles and the cast can be made quite clear, but then it is very difficult to remove this cast from the face without spoiling it - it is very soft and dries for a long time (if someone decides to take it off after it dries). Therefore, it is better to let the clay be not very pliable, but it will dry quickly enough.
to buy clay "for children's creativity" in a children's store ... Regardless of the fact that the working cast (yes, there are two of them!) Was made from slightly moistened clay and dried out rather quickly, it parted a little - as if my muzzle was one and a half times wider . But these are trifles.
Instead of clay, you can use a special mass for modeling or plasticine.
Before pouring wax into the resulting cast, do not forget to close up the holes that were left for breathing. In addition, it is very useful to put a layer of something heat-resistant and pliable, such as foil. It will turn out especially great if the layer is solid, i.e. without cracks. Then it will be easy to remove the resulting wax form from the cast.
Before pouring the wax directly, drip all the cracks of the layer with it. And let the melted wax cool a little so that it is not completely liquid. And then he, being still heavy and hot, will melt the drops and leak. It is also worth pouring wax in small portions, especially at the beginning.
Instead of all this hemorrhoids, you can still try to make the form simply by hand. Blind from plasticine, clay, something else.
Before applying silicone, put a layer of something waterproof, such as cellophane, on the mold to create a layer and prevent sticking.
It is better to apply silicone immediately, laying the strips tightly to each other. Naturally, the thickness of the silicone layer directly affects the drying time. But there is another point: the “inner” side, which is in direct contact with the interlayer, will not dry until it is open to air, i.e. until something is

FASTENING:
Fastening to the head is made according to the principle of "bandana". Made a two-layer lining with a large margin. The shape - a triangle - is located so that the two "side" peaks can be tied back with a tight knot, pressing the "upper" peak to the head. One layer per silicone is glued to the inside of the mask. And the second, lying on top of the first, when the silicone dries, prevents skin contact with the silicone that “wetted” the first layer.
Fabric for creating a bandana-fastener is best used immediately desired color. Linen is a good material for bananas.
If necessary, you can then make cutouts for your ears. The knot can be dyed a hair color, but the dye can dry out and make the fabric stiff. A possible exception is watercolors.