There are many ways to process this node, I know of at least six. The choice of this or that method depends on the type of product, the characteristics of the fabric and the width of the shoulder cut.

Today I will show you one of my favorite ways. In it, I like the simplicity of execution and the ability to sew from the inside out the neck completely around the entire circumference, and not partially, as in other methods. This method is suitable for dressing with medium or wide shoulder cuts. If the straps are narrow, it is better to choose a different type of treatment.
For this master class, the pattern of model 107 from Burda 9/2012 was used as a basis:
Pattern:
Large drawing, leather pockets, A-line ... Ioannina chose a dress similar to the one she wore ...

In order to process the seamy side of the top of the product with edging, it is necessary to cut out the details of the shelf and back from the fabric, make a fitting and make adjustments, if necessary.
In addition, you will need:

Lining fabric (you can also use the main one);
Glue dublerin;
Tracing paper or any paper for transferring the pattern;
Simple pencil;
French pattern-droplet;
Threads, tailor's pins, fabric and paper scissors, ruler.
Step 1

First you need to cut out the facing. If your dress has not undergone any changes during the fitting process, it is better to cut it by reshooting the detail from the dress pattern.
In this case, I corrected the details of the dress, so we will transfer the lines of the neckline of the armholes, the side lines and the lines of the center to tracing paper, superimposing ready-made fabric details on it. Transfer along with the allowances.
Step 2

On the part of the shelf, we carry marks at a distance of 4 cm from the cuts of the armholes and the neck, connect them with a smooth line using a French pattern. If you do not have such a template, you can use any object with smooth outlines, for example, a plate.
Step 3

Similarly, draw the bottom line on the back details. Now you can cut the patterns of the facing parts.
Important!


When cutting out the piping pattern, cut 2 mm along the lines of the armholes and the neckline, so that when connected to the main parts, a beautiful transitional piping is formed, and the piping is not visible from the front side.
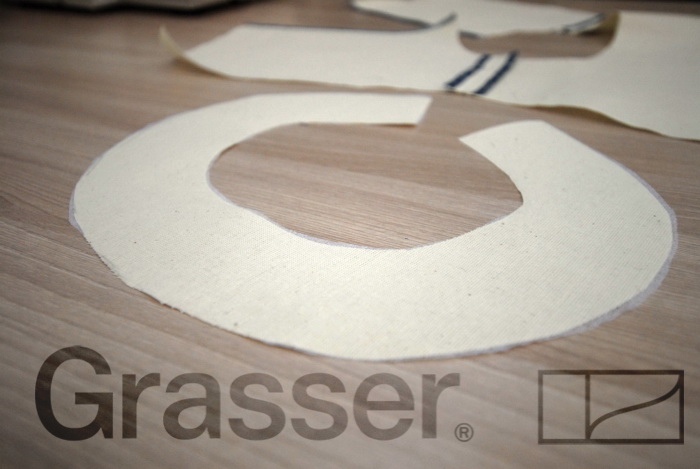
Step 4


Next, you need to cut out the details of the edging on the fabric and duplicate them. When cutting a trim from fabric, pay attention to the direction of the share threads: the direction of the share thread of the trim must coincide with its direction on the main parts of the front and back.
Duplicate the trimming details with glue doublerin using an iron. It is better to duplicate the details completely, together with allowances, so that the neck and armholes do not deform during operation.
Important!
If necessary, you can duplicate with a thin strip of glue cuts of the neck and armholes on the details of the shelf and back from the main fabric. My facing is processed with a rather dense doublerin, so I decided not to do this.
It is up to you to decide whether to duplicate the seam allowances. It depends on the density of the fabric and the dublenine. If it is necessary to reduce the thickness along the lines of the neck and armholes, then the allowances do not need to be duplicated. But at the same time, the dublerin should go to the line of the future line of joining the details of the dress and the trim.

Please note: if you put the finished edging details on the shelf and back, you can see that they do not reach the neckline and armholes by 2 mm.
Step 5

Darts, side seams and a back seam must be stitched and overcast on the dress, as well as a zipper. Leave the shoulder seams open.
Step 6


Place the front piping on the shelf front side to front side aligning the lines of the neck. Chip and stitch.
Step 7

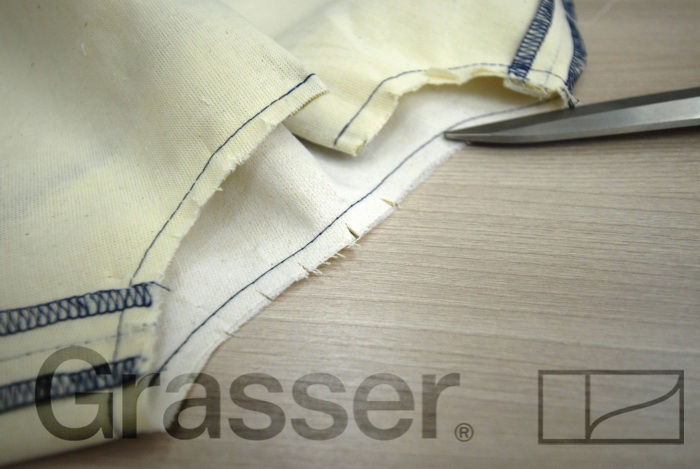
Trim the allowance down to a width of approx. 4-5 mm, if necessary, trim the allowances in steps: the allowance remains wide, which will lie to the front side, that is, the allowance for the main part, and cut off the facing allowance to a width of approx. 3 mm.
Cut the fillet points close to the line.
Step 8

Iron the allowance on the edging.
Step 9


Place a finishing stitch along the piping along the neckline at a distance of ~ 1-2 mm from the seam, grasping the allowances. Unfasten the piping on the dress.
Step 10

Sweep the neckline and press it on.
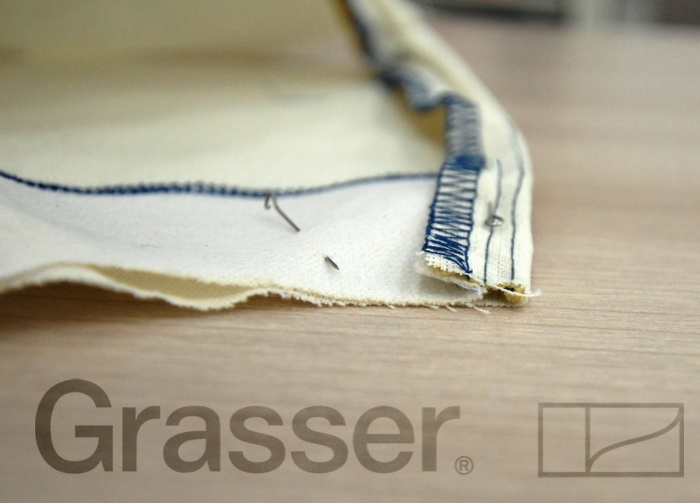
Step 11


Treat the neck of the back in the same way. Pay attention to the processing of the zipper: bend the edging, not reaching the zipper ~ 4-5 mm, then bend the zipper and the allowance for the edging, lay a line on top of this "sandwich". Next, you need to carve out all the extra allowances and corners. Do not sew the piping along the zipper yet.
Step 12

Stitch the side seams of the facing and press on the allowances. If the fabric is fraying, overcast the side seam allowances of the facing.
Step 13

To process the bottom edge of the facing: overcast or process with an inlay.
Clarification: It is possible to grind the side seams of the facing and process its lower cut even before the stage of processing the neckline. It all depends on what kind of operation you need more freedom.
Step 14


Place the piping on the front and back of the front side to the front side, aligning the lines of the armholes. Chip and stitch before shoulder cut approx. 5-7 cm.
Step 15


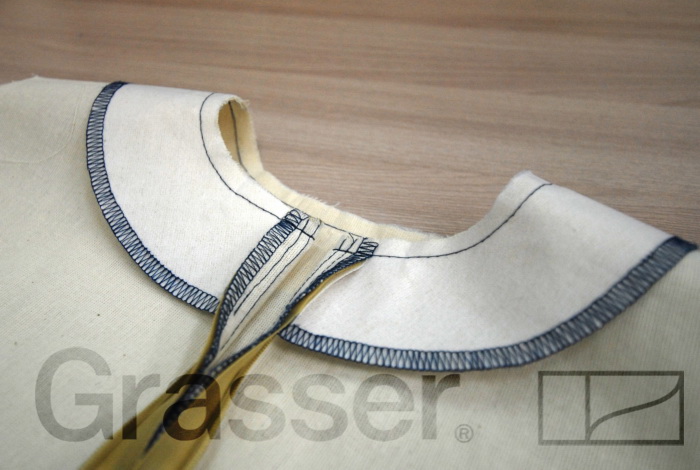
Unscrew the front strap to the front side and insert it into the back strap, the shelf towards the back and the front facing towards the back edge. Align the seam and chop off the shoulder seam.
Step 16


Sew shoulder seams, nibble all corners and iron on allowances.
We propose to process the neck with a facing. Edging is a part that completely repeats the shape of a certain area of the product. What is it for? In order for the curly sections of the product to be beautifully and cleanly processed, and so that the product has a decent appearance. The neckline, waist cut, the area of the bottom of the product and the bottom of the sleeve, etc. can be trimmed.
Today, for example, we will show in detail how to process the neck of the product. You can use our recommendations when sewing such models - Dress No. 149 , Dress No. 83 , Dress number 48, Dress No. 68. If there is a zipper in the product, then in this case the cut is processed by turning not quite usually and there are a lot of processing options. But there is one way that we love very much. We hope you enjoy it too. 1. Prepare the area for cutting the facing.
2. Cut out the facing of the required area. For example, the facing of the neck can consist of both one part and be one-piece, or it can be divided into parts of the back and front. If the fabric allows, sew the overcast in one piece. There will be no extra seals. 3. Duplicate the edging with non-woven fabric.
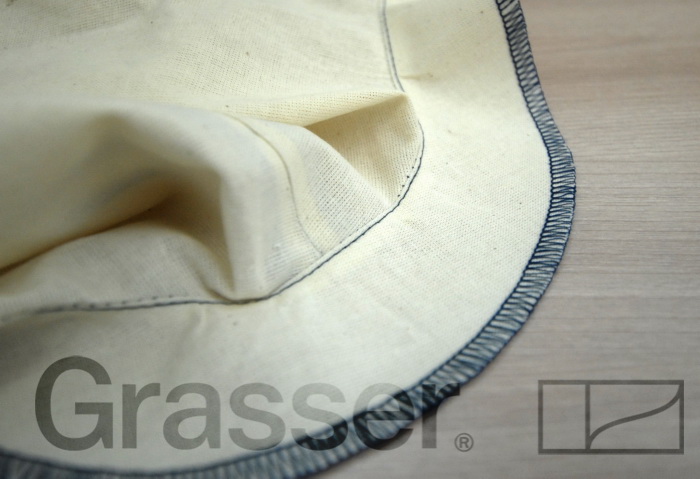
4. We overcast the outer edge of the facing on the overlock.

5. Sew the zipper into the middle seam of the back of the product. 6. Fold the face of the piping with the face of the product. We cut it off with pins.

7. Cut the ends of the trim on both sides to the width of the zipper tape.


8. We connect the ends of the piping with the cuts of the middle seam of the back. This will create a bubble. Do not be alarmed, it should be so!

9. Sew the ends of the zipper to the edges of the middle seam of the back.

10. Bend over all the allowances for the edging. The bubble should now disappear.

11. Fasten the folded allowances with pins.
12. We grind the neck with a facing.
13. We cut the neck turning allowance so that the allowance does not interfere with turning the turning.
14. We spread the edging and the product in different directions. We direct the allowances to the facing. We iron.
15. We lay a functional line along the facing 1 mm from the seam of the grind. This way, the seam allowances will be fixed to the piping and the piping will never come out. You will not be able to line the line from the zipper itself. Therefore, back off about 3-5 cm.

16. Fold back the edging on the product. We iron. 17. Fasten the shoulder seams with hand stitches.

The neckline or cutout on any piece of clothing is almost a "pillar" of everything. appearance products. Therefore, the processing of the neck must be done professionally and with high quality, and most importantly - in accordance with the general style.
club.season.ru
Any experienced seamstress sooner or later he will be interested in how to handle the neck with an unusual and in a beautiful way... Often basic knowledge and simple ways modeling is not enough to complete according to the factory canons. A badly finished collar or neckline can ruin even the most beautiful model of a dress, shirt, jacket or blouse.
Processing methods
Neck finishing options mainly range around bias tape, line trims, trim hemming and threadless cut-off methods. Depending on a particular piece of clothing, perform different types necks with different finishes. These include round, teardrop, square, or V-shaped variations. Usually, in line versions, it is customary to model the drawing towards the texture of the leading part.
Basic processing methods
- Overcast seam.
- Edging with piping.
- Edging cut according to the neck pattern.
- Edging, modeled at an angle of 45 ° to the warp thread - with a bias tape.

infourok.ru
Often, ground types of processing also perform a decorative function. In this case, the facing can be visually viewed from the front in the form of a thin edging. In classic methods, the treatment is not visible from the outside of the garment.
Correct and accurate processing of the neckline will require patience and understanding of some of the nuances of modeling and sewing from the master.

pinterest.com
If you have never finished a cutout, then use the recommendations for high-quality and fast work.
- Consider the upholstery method for each type of material - plain, natural fabric, leather, synthetics. For example, it is better not to leave cotton with open edges; it can peel off strongly and deform the neckline. Leather or thin suede, on the contrary, can be easily processed with a simple stitch without an overlock - using a hemming seam or a bias tape. It practically does not crumble, and sometimes curls beautifully, which makes the product more original.
- Not only the texture of the material, but also the shape of the cutout determines the way the neck is completed. So the collar (V-shaped, rounded, oval) on a knitted blouse is easier to process with a bias tape or hem. For a square and square neckline, the facing method is suitable.
- Not all methods and combinations of methods can be performed with manual processing of the product. For example, only on sewing machine trimming is available.
- If the string does not have a decorative function, all seams must be formed from the seamy side. Possible blind and basting seams from the face.
Materials and tools
- Material for bias inlay (about 1 m, 5-6 cm wide).
- Scissors.
- French pins.
- A simple pencil.
- Sewing machine.
- Tape measure.
Progress
- Use a pencil to draw a line for the first stitch along the neckline of the garment. Use a measuring tape for this. The seam should be 1 cm from the edge of the cutout.
- Cut out a piece for the bias tape from the fabric you bought. Fold it in half and iron it. Form both ends in the form of slightly rounded parts, but sharp at the base. Create a straight seam along the marked lines.
- Next, go to the connection of the cut-out to be cut to the inlay. Place a strip of fabric over the stitch. The center of the strip should follow the stitching. Secure with pins if the fabric is too slippery. Sew the piping to the base along the seam line with a new straight stitch.
- Check the stitching for holes and unnecessary thread. If everything is done neatly, cut off the excess edges of the base material and tape.
- Using sharp scissors, make small cuts on both layers of fabric at a distance of about 1 cm.You can make them by eye or by a centimeter, always from the outer edge, which will hide under another layer of inlay. Be careful not to cut the seams. This step is important so that the neckline is not pinched or grooved.
- Fold the top layer of bias tape to the right side. It can be ironed to avoid extra wrinkles, and the fabric adheres tighter to the base for easy stitching. Using the heavyweight mode and needles, sew the bias tape along the entire circumference of the neckline, 1mm from the edge.
- At the point where the ends of the tape meet, insert them one into the other and finish the stitch with a zigzag. You can do this from the inside out so that the edges are less frayed.

so-sew-easy.com
The undoubted advantage of the bias inlay is its reliability. It will not allow the product to deform and bulge. It can also be sewn with a straight stitch or by hand. If you are planning to make a closure around the neck, it is best to process the fabric at the shoulder seams before doing this. All seam allowances are ironed on before overcasting.
The method is perfect for T-shirts and tops, as well as for processing the armholes of the sleeves.
To process V-neck, you will need the same tools as for sewing on the bias tape, as well as an iron.
- From the main fabric used for sewing the product, cut a strip along the length of the neckline. Fold it in half and iron it with an iron.
- Form a triangle out of it so that the open ends connect at the deepest point of the notch. Secure them with a French pin.
- Sewing the V-neck will require a piece of bias tape already sewn on, so sew the deepest spot 0.5 cm from the edge. You should have a small stitched corner.
- Sew the corner of the cutout on the base as well.
- Make a small cut in the middle of the corner, without grabbing the seam.
- Attach the bias tape to the base face side inward, align the joints and secure with pins.
- Stitch along the basting seams to the end of the small triangle.
- Secure the entire neckline with pins, then, taking them out one by one, go through the cutout with a straight seam.
- Overlock or hand over the open ends of the seams.
- Iron the cutout from the right side to prevent the seams from bulging or bulging in different places. When ironing, direct the seam edges towards the bottom of the garment.
- You can leave the neckline as it is, or walk another straight stitch along the first one at a distance of 0.1 cm so that the neckline fits snugly against the body and does not curl up.

craftsy.com
The way the neck is turned by turning is similar to the two previous ones. The difference is that this method will require a wider piece of fabric for the bottom layer, which can be sewn not only along the neckline, but also at the shoulder seams.
The method will require more strength and attention from you, but it is perfect for processing beautiful evening dress... The peculiarity lies in the fact that the outer seam is located along the edge of the neck and is practically invisible to others. The material lies flat, which only emphasizes the posture and neckline.
- To begin with, you need to cut out a piece of piping corresponding to the neckline, but taking into account the fold and seam allowances. Usually this detail (trimming) is modeled 3-4 cm more along the shoulder line and along the neckline compared to the main fragment. Reverse the edges of the element or trim with curly scissors.
- Fix the piping fragment with French pins to the base with the right sides inward. The seams of the facing and the base should be butt-to-joint in order to avoid distortions of the entire product.
- If your item is modeled with a cut in the neckline area, then mark it with a pencil on the cut trim.
- Then, use a basting stitch along all the edges of the neckline. It is not recommended to use pins, as in this case they can interfere with the stitching in some places. Sew on the piping.
- Only after completing sewing can a cut be made in the middle of the neckline.
- Next, it is necessary to make small cuts (1 cm each) along the entire open edge of the neck. The corners at the top of the cut also need to be cut off.
- Turn the piping over to the wrong side and iron with an iron. So that it does not come out and does not interfere with the process of wearing, baste it with an invisible seam by hand in several places (front, back, shoulders).
- The product can be left as it is, or, as in the case of the bias tape, another visible straight stitch can be stitched along the entire neckline. This stitch can be positioned either close to the edge (1 mm) or at any other distance.

burdastyle.ru
In addition to the above methods, there are also options with the usual hemming of the main fabric, overlock processing and simpler techniques for dense, non-frayed fabrics. So the knitted neck can be sewn with a simple straight stitch at a distance of 1 cm from the edge, and then wrapped in a small roll around the entire diameter or left in a straightened state.
Or armholes. If you make adjustments to the pattern of the product when trying on and sewing, then you should not forget to correct the same areas on the facing. And it's easier to cut out the trims after the first fitting of the product with the corrections made.
The sewing patterns are given on the pattern sheets in the magazine. You can also cut them out yourself. To do this, retreat 3-5 cm from the cut of the neckline and smoothly draw an auxiliary line. Reshoot the details of the facing from the patterns of the front and back as separate details. When cutting, the direction of the share thread on the facing must always match the direction of the share thread on the workpiece. cut out with allowances around the perimeter. To prevent stretching, they are duplicated with adhesive cushioning materials (in accordance with the recommendations for this material). Cushioning materials are available. The cut of the neck is reinforced with a strip of non-woven formband also to prevent deformation and stretching.
So, we start processing.
Stitch the shoulder sections of the garment and the shoulder sections on the seams. Do not neglect the sewing recommendations given in the magazine. Start / finish the line exactly according to the markings (see arrows in the photo). Trim the seam allowances after sewing to 5-7 mm so that they do not coincide in width with the allowances for the shoulder seams of the product. Then, when superimposed on each other, they turn out thinner. Iron out the seam allowances. A multifunctional ironing pad is possible. Overcast the outer edges of the trim. Stick the piping to the neckline with the right side to the front of the garment. Baste.
The rule: Basting from the side of the main product, stitching from the side of the facing!
Grind it down. Cut the seam allowances close to the stitching in steps! to reduce the thickness of the allowance (see arrows in the photo). In the rounding areas, cut notch, 2 mm before the seam line.


If the neck does not need to be trimmed according to the model, unscrew the piping up, iron the piping allowance. In this case, wrinkles should not form. Most comfortable on a special ironing pad or on the edge of an ironing board.

Then welt the seam to the seam allowance next to the welt seam.

Unscrew the piping to the wrong side, to its rightful place, sweep with a slight roll towards the piping, fasten the shoulder seams of the piping to the shoulder seams of the product - they should match perfectly. You can perform this operation on a machine, you can manually, the main thing is neat.
And the final stage is wet heat treatment. With this, it is important not to overdo it, otherwise all work can be "nullified" by weeds and creases. Follow the recommendations in accordance with the type of material, use ironers and a special nozzle for the sole of the iron. Read more about the nuances of the WTO in the corresponding master classes on our website.
I hope that after such a simple MK, beginners will no longer be afraid of this type of neck treatment. Good luck!


